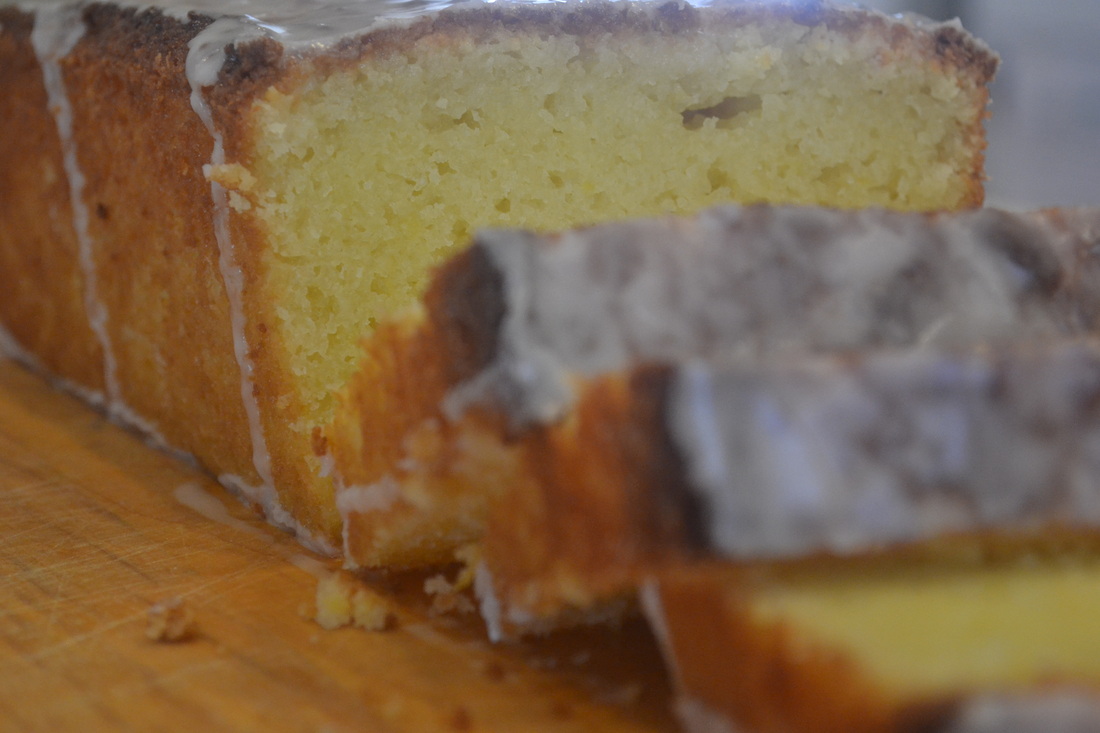
Hello and Happy New Year! Welcome back to the Butter Blog! After a very long break from blogging I've decided to start it up again and I'm very excited about it! There were so many things going on for me the 2nd half of last year that blogging took a backseat to other priorities. We've been in the new house for 3 months and have celebrated 3 major holidays already. Happily, moving boxes and decoration boxes are now all clear from my living space and I can finally relax, cook, blog and enjoy life....ahhhh! For a short while I contemplated stopping blogging altogether, but then I remembered why I started it in the beginning a little over a year ago - to challenge myself to try become a better cook, to document my favorite recipes all in one place and to share those recipes with friends and family. To that end, I am committing myself to blog at least one time a week, so...here goes!! The first recipe I want to share with you is a heavenly Lemon Loaf Cake. I made this cake several months ago, only a few weeks after we moved in, and I can still remember the taste of the cake so well! It has a beautiful yellow color inside the unassuming brown crust. The lemon flavor was bright but not overpowering. And the texture was a little dense, almost like a ricotta-based cake (which I LOVE!) and oh-so-indulgent! After eating my weight in sugar during the month of December I've found myself really craving citrus foods right now. This Lemon Loaf is perfect for that craving! I can't wait to get in the kitchen this weekend and make another batch! 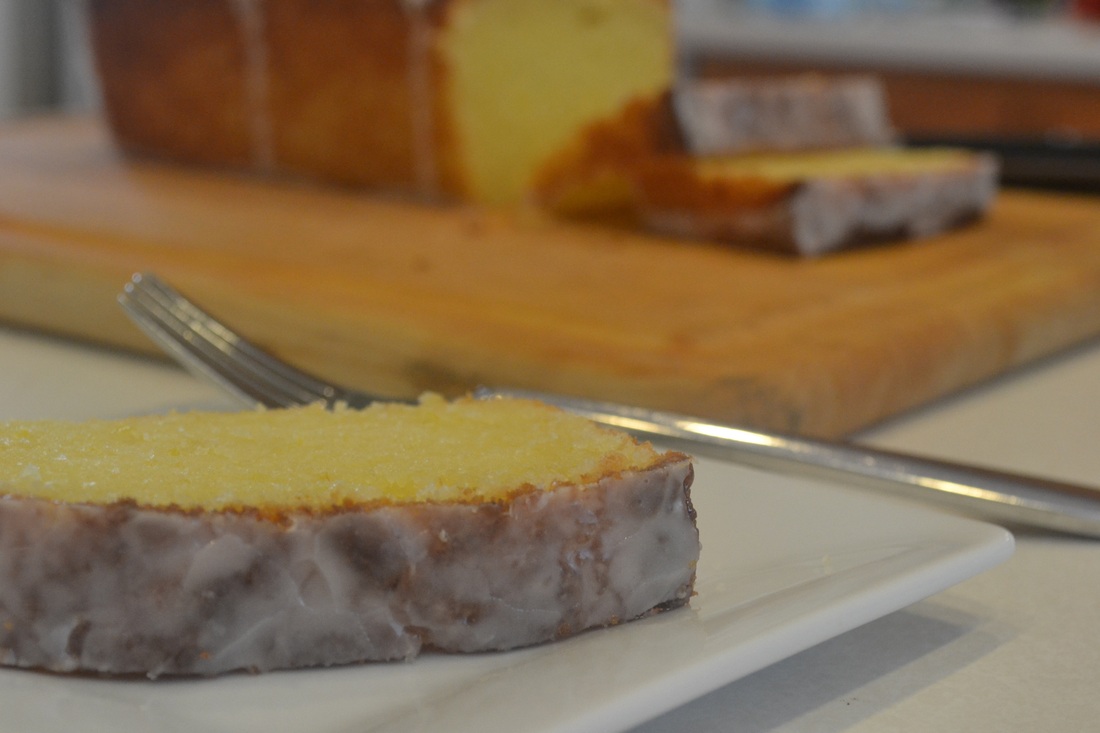
Lemon Loaf Cake
Makes 2 loaf cakes - approx 16 slices each For the cake 1 1/2 cups cake flour 1 1/2 cups all-purpose flour 2 teaspoons baking powder 1/4 teaspoon baking soda 1 teaspoon salt 2 1/4 cups granulated sugar 8 large eggs, at room temperature 1/4 cup lemon zest (approximately 2 lemons) 1/4 cup fresh lemon juice** 2 cups (4 sticks) unsalted butter, melted and cooled 1/2 cup sour cream 2 teaspoons vanilla extract **Tip: Zest your lemons while they are whole, before juicing. It is MUCH easier this way! For the lemon syrup 1/3 cup fresh lemon juice 1/3 cup granulated sugar For the lemon glaze 2 cups confectioner's sugar, sifted 4-6 tablespoons fresh lemon juice Preheat oven to 350° F. Butter sides and bottoms of 2 9-9-inch loaf pans. Line with parchment, then butter the parchment. Set aside. In a medium bowl, whisk together the cake flour, all-purpose flour, baking powder, baking soda and salt. Set aside. In the bowl of a stand mixer, fitted with a paddle attachment, combine the sugar, eggs, lemon zest and lemon juice. Mix on low speed until just combined. With the mixer running, slowing pour in the melted butter. Add the sour cream and vanilla and continue mixing until all ingredients are incorporated. Gradually add the flour mixture using a rubber spatula to gently fold in, being careful not to overmix. Divide the batter evenly between the prepared loaf pans. Bake on the middle rack for 20 minutes. Rotate the pans and reduce the oven temperature to 325° F. Continue baking for another 30-35 minutes, or until a toothpick inserted in the center of the cake comes out clean. Allow to cool in the pans for about 15 minutes. While the cakes are baking, prepare the lemon syrup. Combine the lemon juice and granulated sugar in a small saucepan over medium heat. Stir until the sugar is completely dissolved. Cook for approximately 3 more minutes. Remove from heat and set aside. Remove the cakes from the pans and place on a parchment or Silpat lined baking mat. Using a toothpick, poke holes in the tops and sides of the cakes. Brush with the lemon syrup, allow to soak in and brush again. Allow the cakes to cool for approximately 30 minutes. When the loaves are cool, prepare the lemon glaze. In a small bowl, whisk together the confectioner's sugar and 4 tablespoons of the lemon juice. The glaze should be thick, but pourable. Add more lemon juice, if needed, to reach desired consistency. Pour the glaze over top of each loaf (it will drip down the sides). Let sit for about 15 minutes, or until the glaze hardens, before serving. When I made this recipe I 'halved' it to only make one loaf. My loaf kept well, unsliced, in Tupperware until it was gone (about 5 days). I plan on making the full recipe the whole way through to the glaze and cutting and freezing it by the slice. I'm not sure how this will come out but I'm going to give it a try. It sure would be convenient to grab a yummy slice to go on busy mornings! Source: As seen on Cook Like a Champion, originally from Baked: New Frontiers in Baking
0 Comments
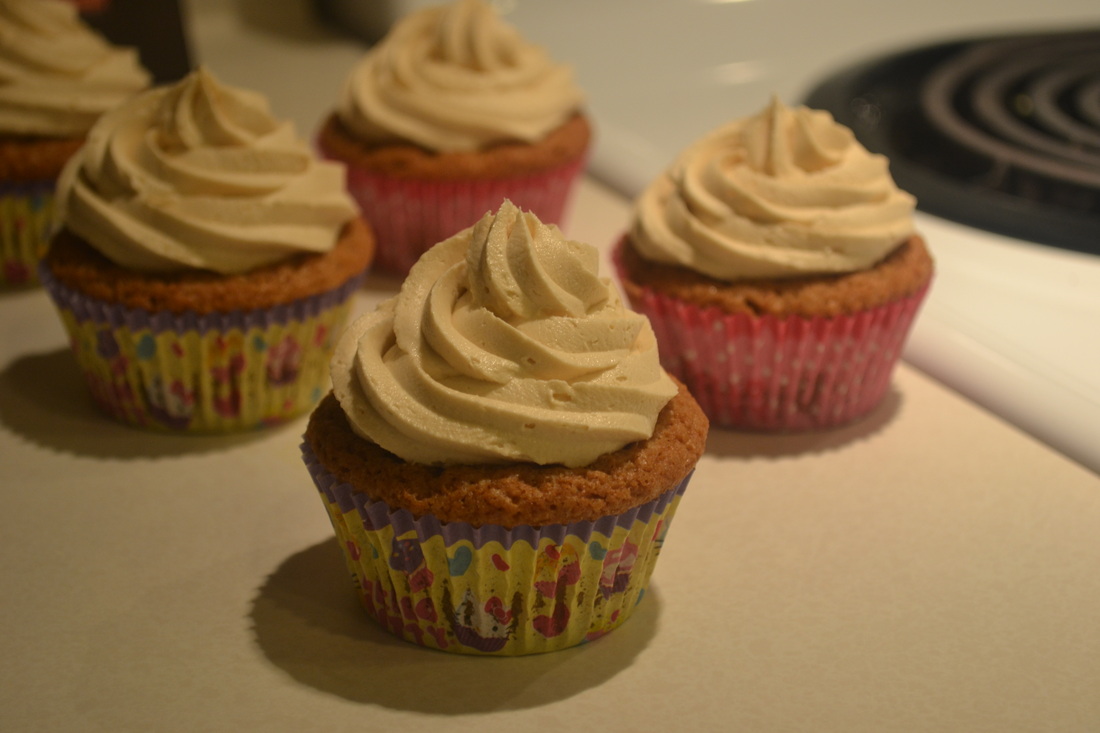
I realize that in many things in life I'm a bit late to the party. Skinny jeans. Ugg boots. Any TV series that actually makes it past the first season. Heck, I just recently discovered Food Blogs! So it's no surprise that I'm late on discovering Biscoff spread. Have you heard of this stuff??? Or better yet, have you tried it??? I have been seeing it featured in a lot of recipes lately and I just couldn't understand the fascination. I was lucky enough to try a sample at my local grocery store and I was hooked! The flavor is a little tough to describe, but it reminds me of a graham-cracker peanut-butter-type spread. I knew as soon as I tried it that I would have to been baking something up soon and since I just moved to my new house and haven't made cupcakes in a while....well...here you go! Biscoff cupcakes!! These are super easy to throw together. The texture of the cupcake itself came out a little like banana bread. They may have been a tad over-baked. (I'm still learning this new-to-me base model oven. The only good thing about it is that I get to go oven shopping. Yaaay!) The frosting was absolutely amazing! As usual, I used Plugra European Butter and the taste and texture were perfect! These were gone quickly - even my super-picky 7-year-old loved them! 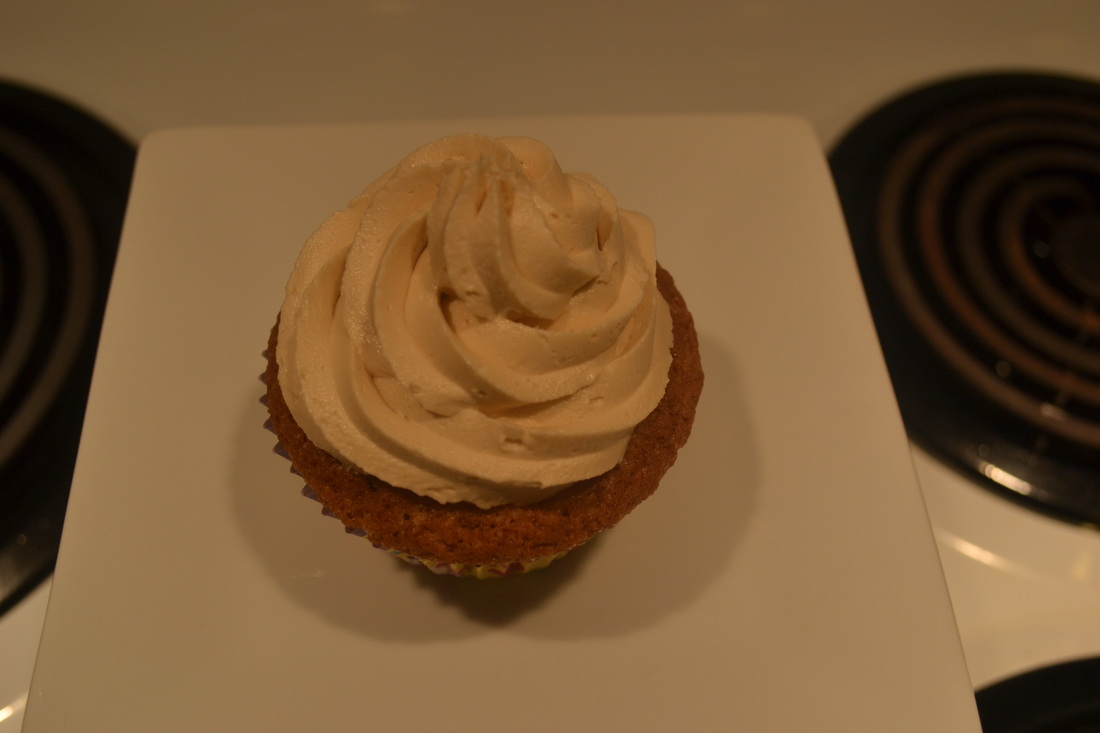
Biscoff Cupcakes
Makes 12 cupcakes For the cupcakes 1 cup all-purpose flour 1 cup granulated sugar 1/2 teaspoon kosher salt 1/2 teaspoon baking soda 1/2 cup canola oil 1/2 cup sour cream 1/2 cup Biscoff spread 2 large eggs 2 teaspoons vanilla extract Preheat the oven to 350. Line a standard cupcake pan with 12 liners. Set aside. Sift flour, sugar, salt and baking soda in a medium bowl. Whisk together. Set aside. In the bowl of a stand mixer fitted with the paddle attachment, place the oil, sour cream, Biscoff spread, eggs and vanilla. Mix on medium speed until well-combined. Slowly add the dry ingredients to the mixer bowl and mix on low until just combined. Fill the cupcake liners about 2/3 full. Bake for 18-22 minutes until a toothpick inserted in the middle comes out clean. Remove from oven and allow to cool in the pan for about 5-10 minutes. Remove from pan and allow to cool completely on a cooling rack before frosting. For the buttercream 2 sticks unsalted butter, room temperature 1/4 cup Biscoff spread 4-5 cups confectioner's sugar, sifted 2 tablespoons milk Place butter and Biscoff spread in the bowl of a stand mixer fitted with the paddle attachment. Cream together on medium-high speed until light and fluffy, about 5 minutes. Turn the mixer to low and gradually add the sugar. Once all the sugar has been added, beat in the milk. Turn the mixer back on high and beat until light and fluffy once again, about 5 minutes, Transfer the frosting to a pastry bag and swirl onto cupcakes. **I PROMISE I will figure out how to use my camera!! I apologize for all the shadowy pictures! Source: Barely adapted from Picky Palate 
Change. A very powerful word. A word that means a lot of me and my family right now. There have been A LOT of changes here at Butter is Better over the past 6 weeks. We had been trying to sell our beautiful townhouse for well over a year so that we could move to a nice, single family home with a (tiny!) yard of our own. Finally, in August, we found a buyer for our townhouse! We were overjoyed and elated to finally make a move on the house we had been eyeing up for several months. Well, one thing led to another and the next thing we knew we were 100% moved out of the townhouse and moved IN TO my parents townhouse across the street (thank you mortgage company) for 2 1/2 weeks before closing on our new place. During that time the 6 of us lived in tight quarters but had tons of laughs and good times! Definitely an experience I hope my girls remember for the rest of their lives! So that brings me to today. Today I am, once again, a happy homeowner! We have been in our new house for 5 glorious days! There are so many things I love about the house...however...my kitchen is not one of them :( The kitchen is quite large with 9 foot ceilings which gives me awesome cabinet height (aka - storage!) but that's about where the love ends. The previous owners went with builder-grade material throughout the kitchen. The only plus side is that I will get to redesign everything to my liking in due time. The wait is going to be tough, but I have tons of ideas! How does an obsessive baker adjust to all these changes? By baking something of course!! A large portion of my kitchen is still packed in boxes so I am limited as to what I can bake, but I did keep a few essentials on hand. Based on what I had on hand, here is what I picked up at the grocery store the other day.... 
As a hard-core baker I could have been embarrassed by this purchase, but instead I laughed about how much I needed to bake something...anything!! Have you ever tried these? They are pre-made Nestle cookie dough that is already scored! I didn't even need to find my spoons to make this project a reality! 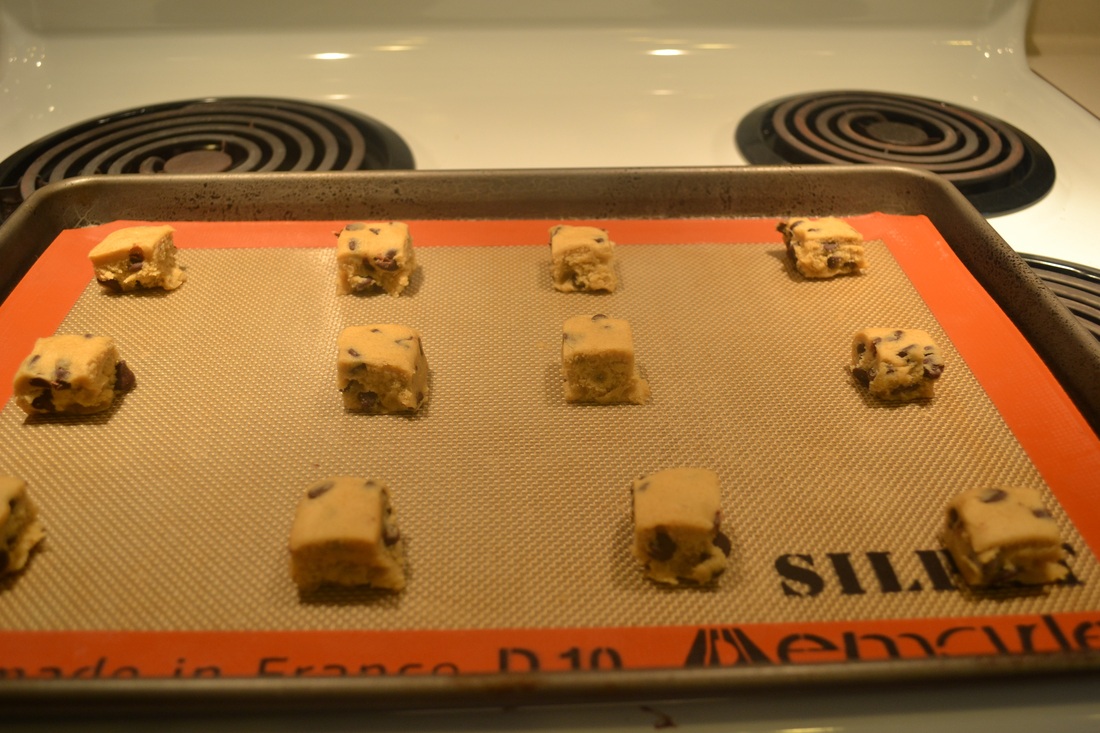
Just break them apart and plop them down on a cookie sheet. Simple, right? Yes, but....bad things can still happen.... 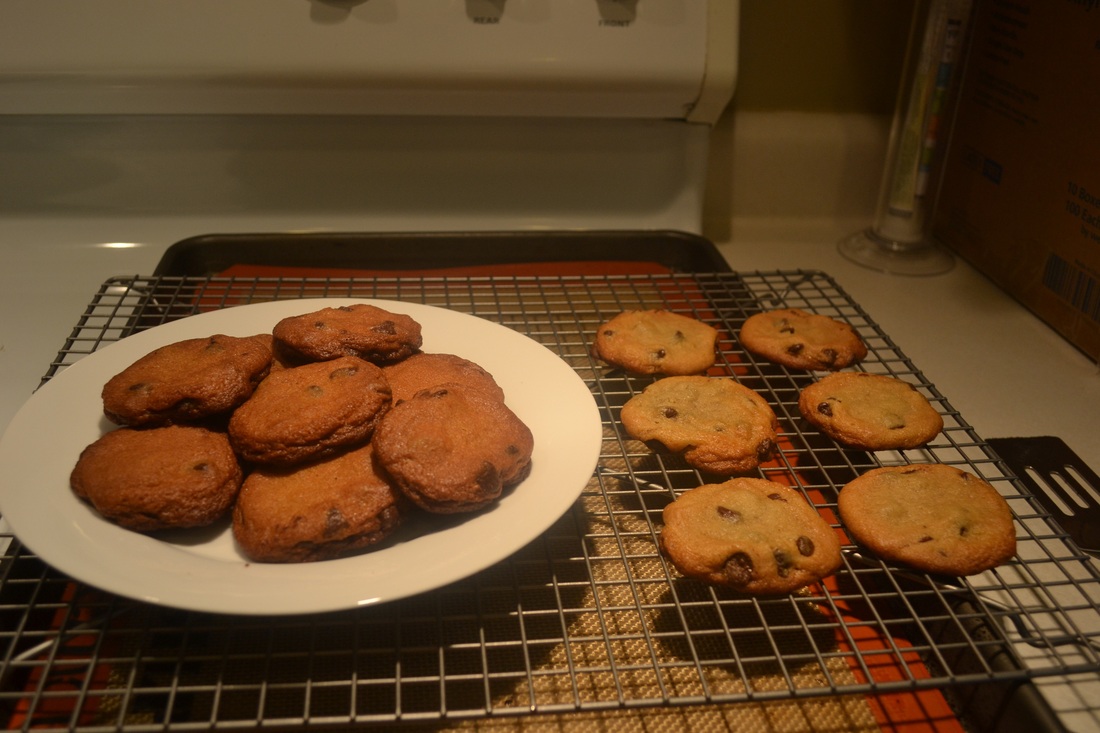
As you can see, my first batch (on the plate) is quite a bit darker than my second batch. This reminded me that every oven is different and it will take some time to get used to this new one. *sigh* Oh well, at least I can say I baked for the first time in my new house! Now, it's time to get cracking cause I have so many things I want to share with you! Some goodies to look for soon are Fudgy Sea Salt Brownies, Oatmeal Cream Cakes and Chocolate Ice Cream!
Oh, and for the record, the cookies were a hit with the family! Just goes to show you, you can never go wrong with Nestle Toll House Cookies! 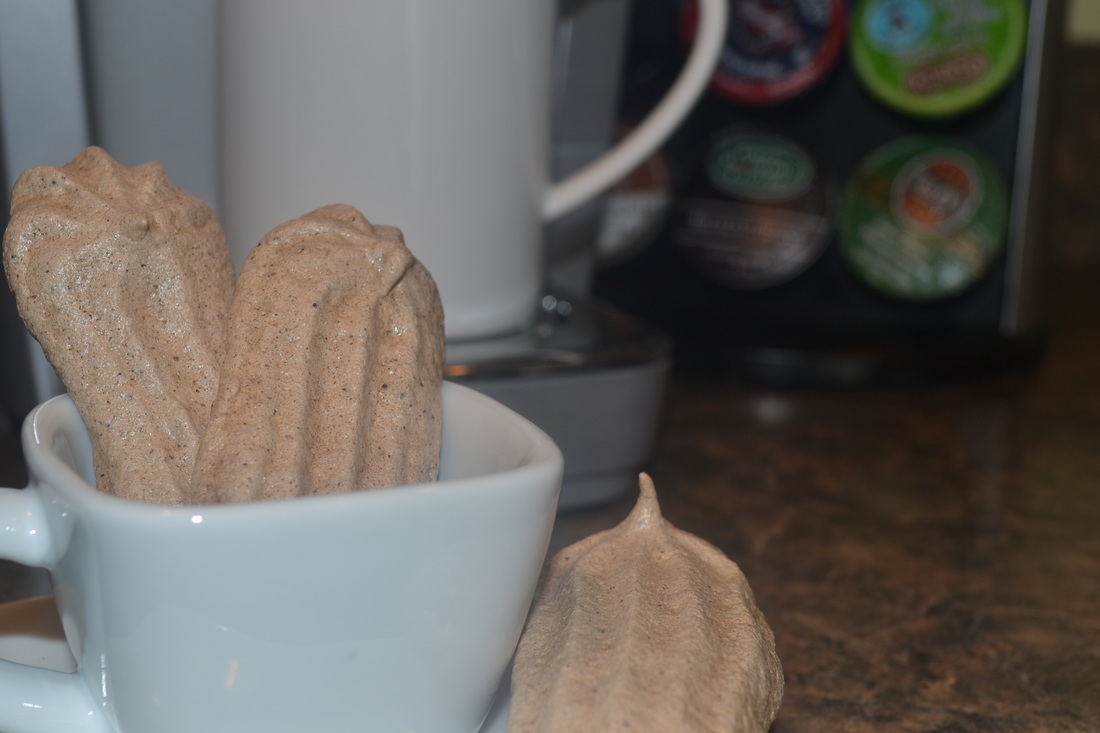
I know I've said this before and I know I'll say it again, but, it's time for me to get healthy in my diet! I am a runner and I've always loved to exercise, but when it comes to eating healthfully I definitely don't always practice what I preach. My love for cooking, baking and eating always wins over in the end. So I'm constantly on a quest to find recipes that I can have fun creating in the kitchen AND not feel guilty if I accidentally eat half the batch! Ooops! Last night I broke open Williams-Sonoma's Essentials of Healthful Cooking and this recipe caught my eye instantly. I've made meringues before and I know a few things about them - 1. they are very low in calories 2. they require very few ingredients and 3. they are the perfect sweet and crunchy treat any time of day. This recipe had me particularly excited because it calls for Dutch process cocoa powder and I finally scored myself some while on vacation in Richmond, VA at For the LOVE of Chocolate. I had heard about this store on my favorite blogger's site, Annie's Eats, and I'm so glad I stopped in! I could have bought a ton of stuff to bring home but since the temperatures were near 100° and we were nowhere near our hotel I decided not to. I did, however, treat myself to a Dark Chocolate and Bacon Truffle. Oh. My. Gosh! So rich and smoky. I'm a huge fan of bacon in/on my sweets so this was a real treat for me! Back to the meringues, I'm not sure if it's the cocoa powder or what, but these are so yummy! I've had, oh, um, maybe 6 since they came out of the oven an hour ago and the girls have probably had 3 each. No worries though, because the recipe makes a ton! 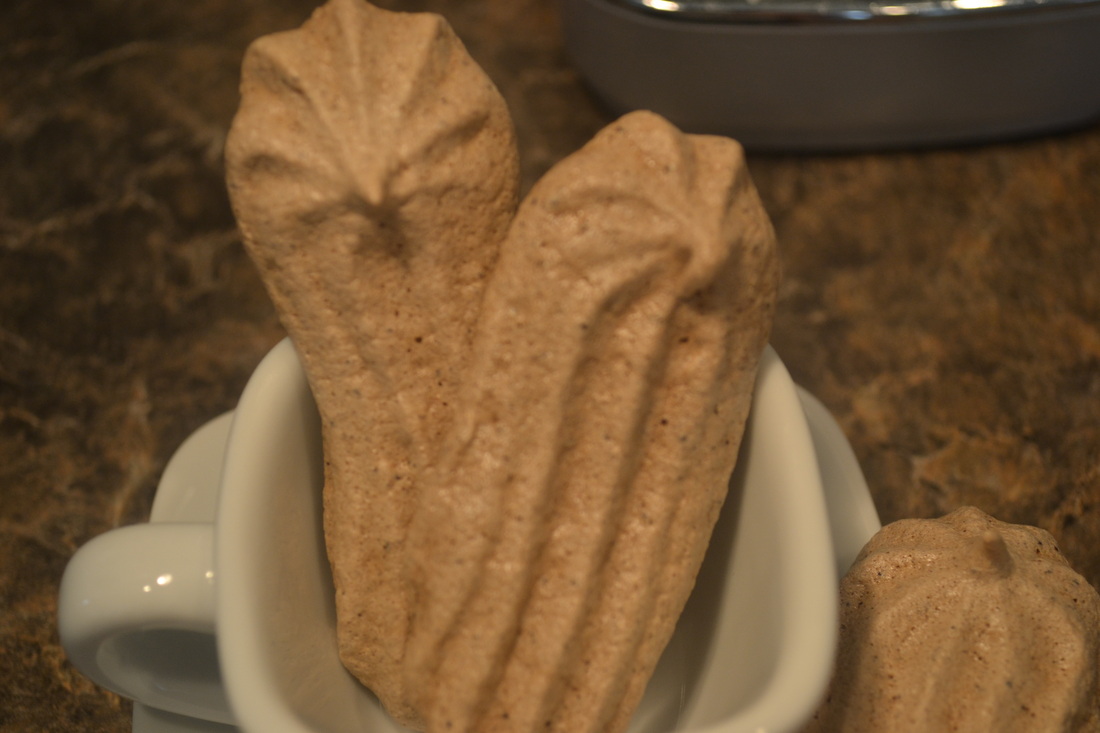
Chocolate Meringues
6 egg whites (make sure to have NO egg yolk remnants in the egg whites or you will never get stiff peaks) 1/4 cup Dutch-process cocoa powder 1 1/4 cups sugar, divided Pinch of kosher salt Position 2 racks in the center of the oven and preheat to 250° F. Line 2 baking sheets with a silicone baking mat or parchment paper. Set aside. Sift together the cocoa powder and 1/2 cup of the sugar into a medium bowl. Set aside. Place egg whites in the bowl of a stand mixer fitted with the whisk attachment. Beat the egg whites on medium speed until very frothy, about 1 minute. Add a pinch of kosher salt and continue beating until soft peaks form, about 2-3 minutes. Increase the speed to high and begin to gradually add the remaining 3/4 cup of sugar, 1 tablespoon at a time, allowing sugar to fully incorporate between each addition, about 10 seconds. Once all the sugar has been incorporated continue beating until stiff peaks form, about 1-2 more minutes. Sprinkle 1/3 of sugar/cocoa mixture over the egg whites. Using a rubber spatula, gently fold the sugar/cocoa mixture into the egg whites, being careful not to deflate the egg whites. Once the sugar/cocoa is fully incorporated, repeat with another 1/3, then the final 1/3 of the sugar/cocoa mixture. Once all the sugar/cocoa is incorporated into the egg white mixture, transfer to a large pastry bag fitted with a star tip. Pipe meringues onto the prepared baking sheets in the formation of a ladylock, about 2 inches long. (You can get creative here and pipe any shape you like, really!) Space the meringues about 2 inches apart. Bake until meringues are completely dry, about 2 1/2 hours. Transfer pans to wire racks to let them cool completely. Once cool, carefully lift off trays and place in an airtight container for up to 3 days. Source: Barely adapted from Essentials of Healthful Cooking by Williams-Sonoma 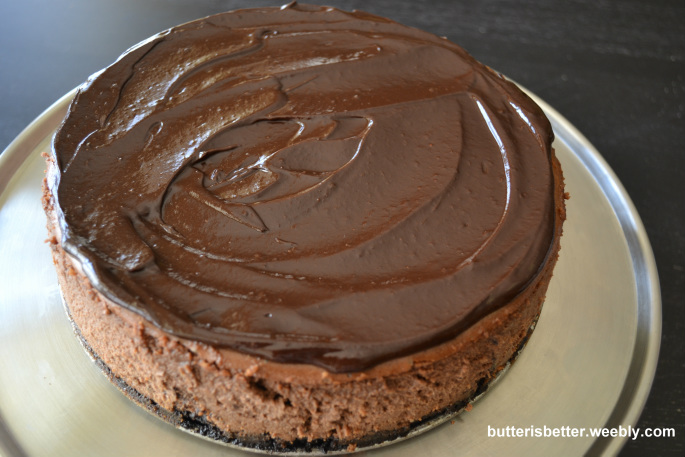 Summer birthdays run high in my family. My little Bean's was 2 weeks ago and hubby's was a few days ago (along with my not-so-little-nephew 200 miles away...happy birthday buddy!). Since most of my family has lost all interest in my cupcakes (*sniff*) I am branching out to find other decadent desserts to celebrate their special day. My hubby has a strong affection with chocolate, which seems to be growing stronger with each passing year. So obviously, my inspiration for his cake was easy - chocolate-chocolate-chocolate! I haven't had a good cheesecake in a while so when I came across this recipe for Triple Chocolate Cheesecake I knew I had to try it. Wow! This cake was insane! It's rich with chocolate, but the creaminess of the cheese cuts it back a bit. It's just, *sigh*, PERFECT! Because this cake is baked the night before, the active prep time is actually pretty quick and the results are simply amazing! 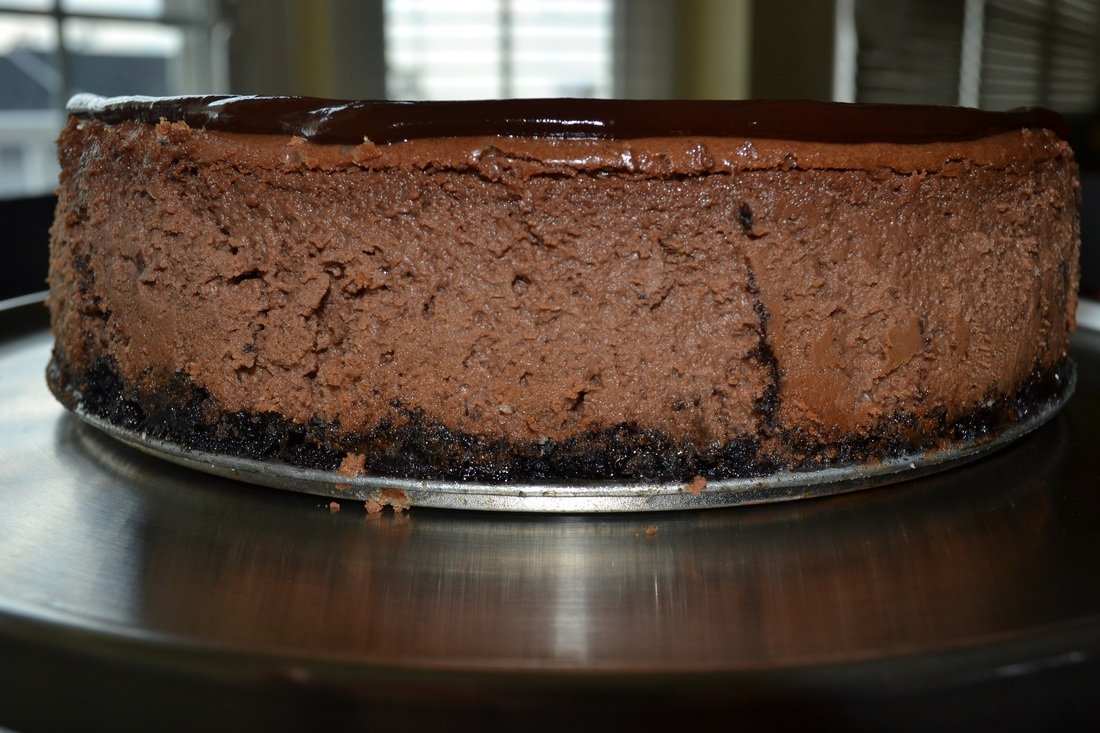 Look at all those layers of chocolate! Triple Chocolate Cheesecake Serves 12 For the Cheesecake 9 ounces chocolate sandwich cookies, such as Oreo 6 tbsp unsalted butter, melted 32 ounces (4 x 8 ounce bars) cream cheese, at room temperature 1 1/2 cups sugar 1/2 tsp salt 4 large eggs 1 cup sour cream 8 ounces semisweet chocolate, melted For the Chocolate Ganache 1/4 cup heavy cream 4 ounces semisweet chocolate, chopped Preheat the oven to 325 degrees. Line the bottom of a 9-inch springform pan with parchment paper. Set aside. In the bowl of a food processor, pulse chocolate cookies until finely ground. Add melted butter and pulse to moisten. Transfer to prepared springform pan and press the mixture evenly into the bottom of the pan. Place the pan on a rimmed baking sheet and bake for 10 minutes. Remove from oven. Set aside to cool. Wipe out the bowl of the food processor. Combine cream cheese, sugar and salt. Blend until smooth. With the motor running add the eggs, one at a time, mixing well after each addition. Keeping the motor running add the sour cream and melted chocolate. Blend until smooth, scraping down the sides of the bowl as necessary. Pour mixture onto prepared crust. Bake for 1 hour, until just set. Turn off the oven and leave the cheesecake in the oven with the door closed for 1 additional hour. This will help prevent cracking. Remove from the oven and run a thin knife around the edges of the cake. This also will help prevent cracking. Once the cake is cooled, cover loosely with plastic wrap and place in the refrigerator for at least 6 hours, or overnight. When ready to serve, prepare the ganache. In a small saucepan, bring cream to a boil. Remove from heat and add chocolate. Stir until melted. Set aside until thickened, about 2-5 minutes. Carefully unmold the cheesecake from the springform pan and pour the chocolate ganache over top. 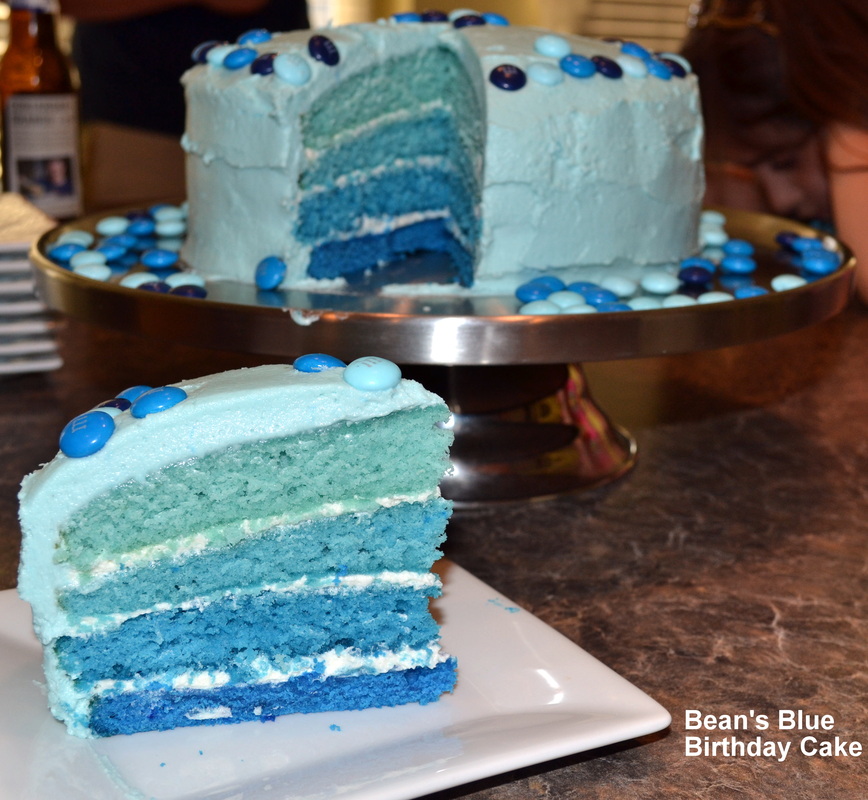
Yesterday my baby girl, Brecken, turned 4 years old. I can't believe my baby is 4 already!! Brecken had a bit of a tough start to life. Lots of visits to Children's Hospital in the first few years...lots of visits with therapists....and lots of hard work. Yesterday on her 4th birthday we celebrated no longer needing to thicken her liquids for fear of aspiration, a huge advancement in her speech and finally being potty-trained! Yes, our little Bean has come a long way and we are so proud of her! One of Brecken's favorite things in life is the color blue (much to her purple-loving-sister's disapproval). Her other favorite thing is M&M's (big sister approves of those!) To that end, I decided an over-the-top blue and M&M cake was perfect for her! I have seen these multi-colored layer cakes all over the blogosphere and thought I'd give it a try. I think it came out pretty well, though I did learn a lot through this process - I'll share my tips with you on the way through the tutorial I've created for you. The first thing I did was make a batch of my favorite vanilla cupcake batter. 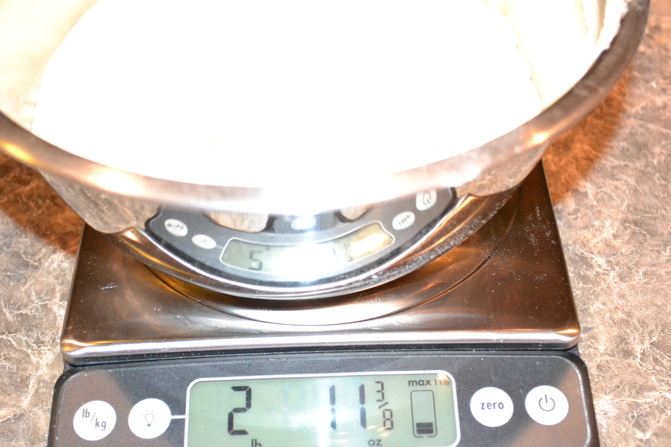 Weigh the total batter amount. 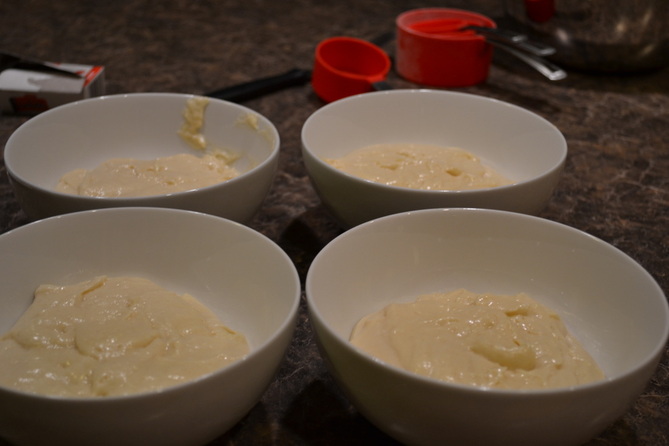 Next, I divided the batter evenly into 4 smaller bowls. This is where the kitchen scales comes in very handy. This is also where I learned I need to invest in some nice mixing bowls! 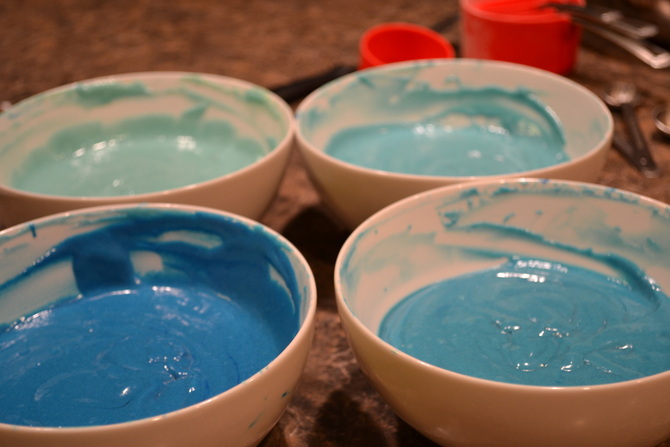 Then, using Wilton Food Coloring Gels I colored each of the bowls of batter different shades of blue. The lightest one used 3 toothpicks worth, the next one was 4 toothpicks, then it was 5 and I think we used about 7 on the last one. Just keep adding gel until you reach your desired color. 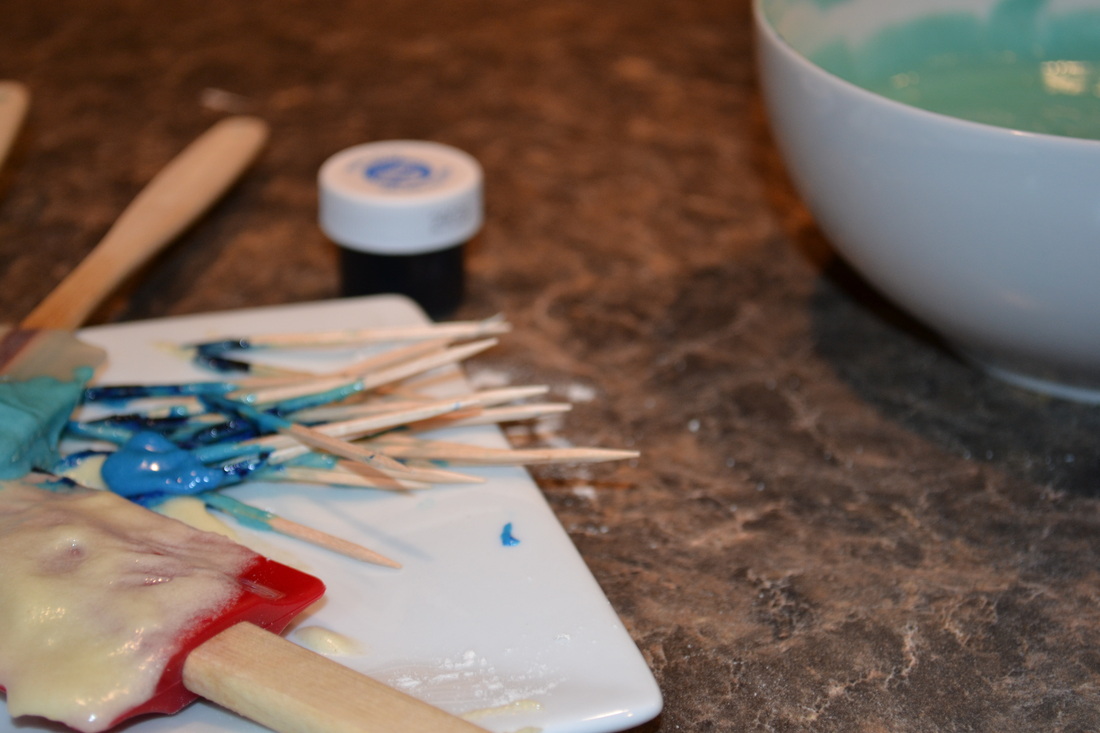
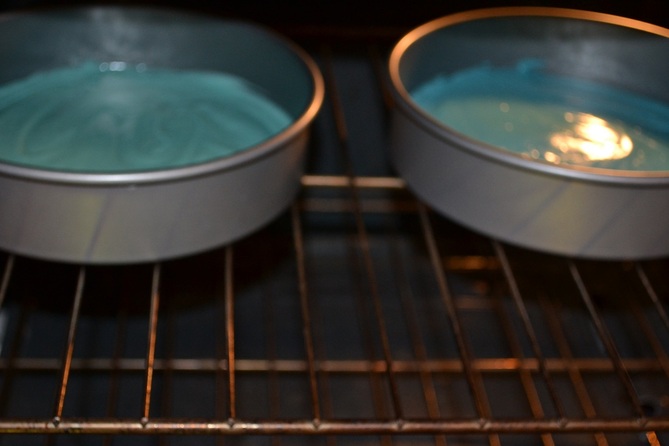 Place two of the batters into 8-inch round cake pans lined with parchment paper. Bake at 350 for about 14 minutes, or when a toothpick inserted in the middle comes out clean. When the first two were baked and cooled slightly I removed them from the pans and placed them on a cooling rack to cool completely. Bake the last two colors as instructed above. 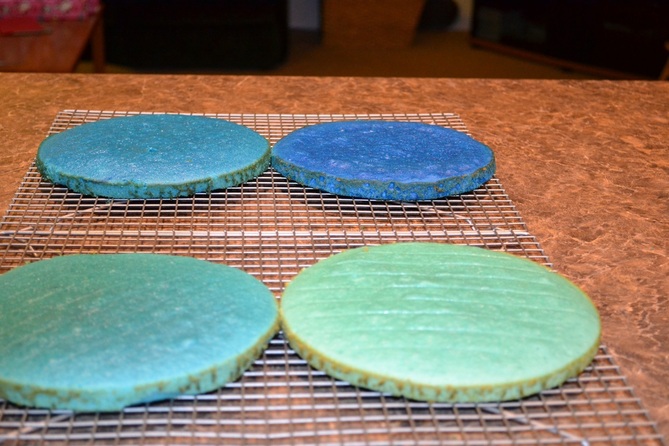 You should end up with 4 thin cake layers. I baked my cakes the night before so I wrapped each layer tightly in plastic wrap and set them out at room temperature until I was ready to use them. Before assembling the cake make a batch of basic vanilla buttercream. I used this recipe: 3 sticks of unsalted butter, softened (I use Plugra) 6 cups of powdered sugar 1/4 tsp kosher salt 6 Tbsp heavy cream 2 Tbsp vanilla extract In the bowl of a stand mixer fitted with a paddle attachment, cream the butter for 3-4 minutes, until light and fluffy. Add the salt to the confectioner's sugar, whisk together. On low speed, slowly add 1/2 of the confectioner's sugar to the mixing bowl. Slowly add the heavy cream and vanilla. Once incorporated, add the remaining confectioner's sugar, stopping the scrape down the bowl if necessary. When all the ingredients are fully combined turn the mixer on medium-high speed and beat for 5-7 minutes until the frosting is light and fluffy. 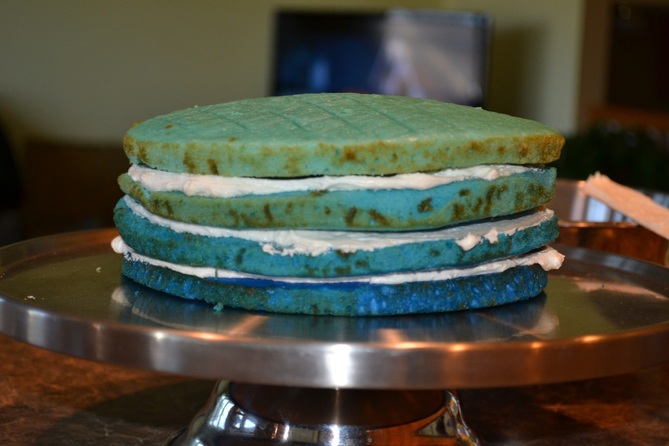 When ready to assemble your cake, place the darkest color on the bottom and spread a layer of frosting on top. Continue to layer cake and frosting until you have 3 layers of frosting in between the 4 layers of cake. Here's where I started to figure out what to do better next time. First of all, I would probably assemble the cake on a cake board and a piece of parchment. This would allow to easily clean up the excess frosting and transfer the cake to the cake stand when ready to serve. Second, I was worried that I would have enough frosting so I went a little thin on each layer. In the end this recipe had MORE than enough so I would have put a good amount more frosting between each layer. Third, I would have used a knife to even out the top layer. It didn't look too crooked to me at this point but I later learned it really was! 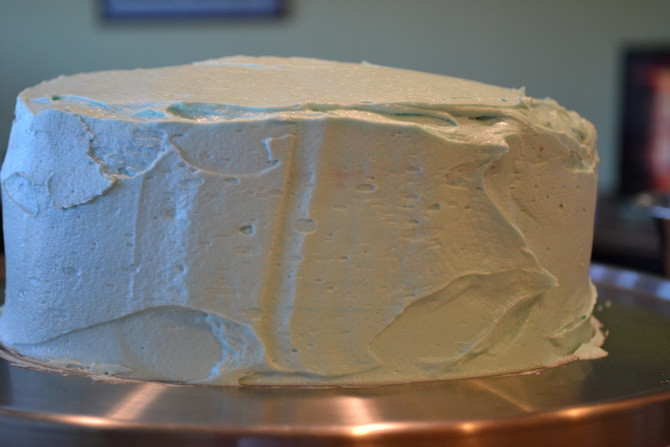 At this point what I did was use my blue food gel coloring again to tint the frosting to the shade of blue I wanted. I proceeded to frost the cake. In the future what I will do is put a 'crumb coat' on my cake first. To do this you simply spread a thin layer of frosting (white or colored) on your cake - it's ok if there are crumbs in the frosting. Place the cake in the refrigerator for about 30 minutes until the frosting is set. After 30 minutes you can proceed to frost your cake. From what I've read online this makes a huge difference and I wish I'd done it. All in all, my cake came out ok. But I'm really excited to use the tricks I've learned along the way on my next cake!  The last thing I did was decorate the cake with lots of M&Ms! 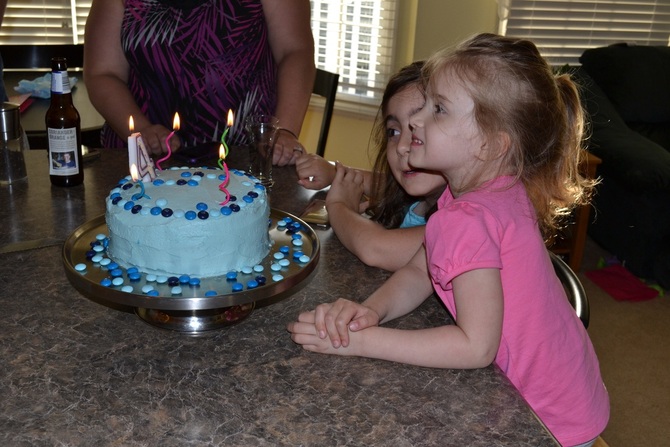 The birthday girl in all her blue glory! 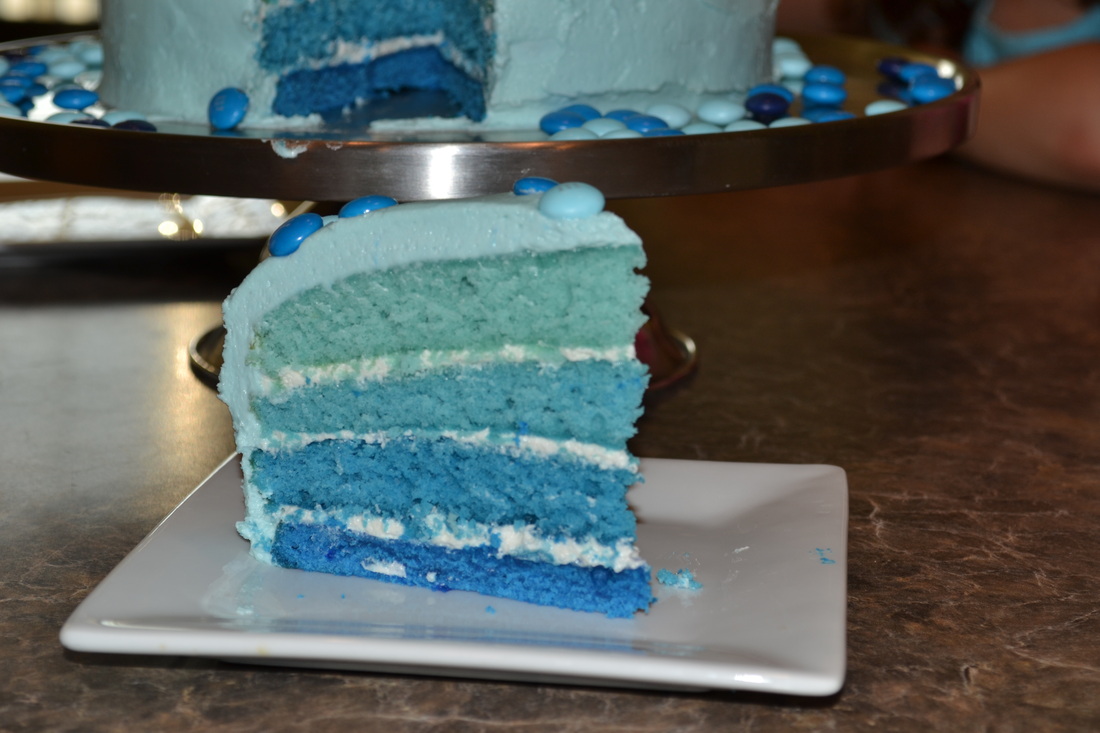
Thank you all for allowing me to practice my cake decorating (and photography!) on you!
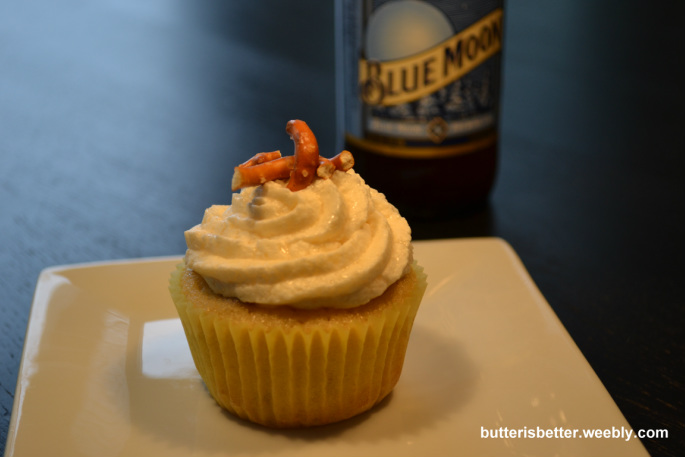 Hi there! Remember me? I'm the poor, lonely, neglected food blog. I've been pushed to the side in favor of needy little ones, PTA meetings, house showings and cupcake orders. However, I have never been forgotten! I'm back today to share with you a fun cupcake recipe (really though, aren't all cupcakes fun?) that I made for my dad's 63rd birthday a few weeks ago. When deciding what flavor cupcakes to make for my dad the first thing I came up with was coconut. Sure, coconut is an easy choice - Dad loves it. But isn't that a bit too predictable? So I asked myself, what else does Dad love? Well, BEER, obviously! And what goes with beer? PRETZELS, of course! So I took my favorite vanilla cupcake recipe and jazzed it up with some Blue Moon Beer and pretzel bits and here's what you get!! The Blue Moon is subtle but noticeable in the vanilla cupcake and the crushed pretzel pieces add a nice bit of saltiness to the cake. The pretzels in the cupcake will get soggy once baked, so I added crushed pretzels to the top of the frosting right before serving. Waiting til the last minute gives you that nice crunch you are looking for. 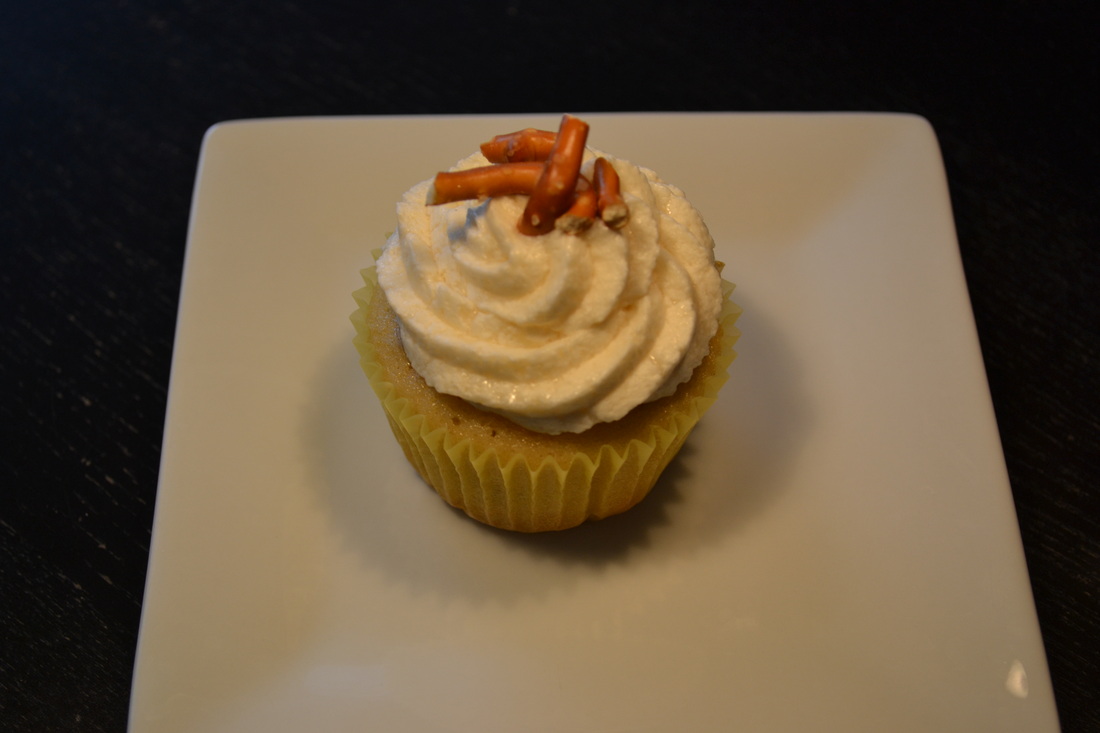 Blue Moon Cupcakes
Makes about 24 cupcakes For the cupcakes 2 1/2 cups all-purpose flour 2 1/2 teaspoons baking powder 1/4 teaspoon salt 8 tablespoons unsalted butter, at room temperature 1 3/4 cups sugar 2 eggs, at room temperature 2 1/2 teaspoons vanilla extract 1 1/4 cups Blue Moon Beer, at room temperature 1 cup crushed pretzels Preheat oven to 350. Line a standard cupcake pan with 24 liners. Set aside. In a medium bowl, sift together flour, baking powder and salt. Set aside. In the bowl of a stand mixer cream the butter and sugar together for about 3-5 minutes, until light and fluffy. Add the eggs, one at a time, mixing slowly after each addition. Add the vanilla extract to the Blue Moon in a large measuring cup. With the mixer on low add 1/3 of the flour mixture, followed by 1/2 of the Blue Moon/vanilla mixture. Add another 1/2 of the flour, followed by the rest of the liquid. Finally, add the last of the flour, mixing until just combined. Gently fold in the crushed pretzels until well incorporated. Fill the cupcake liners about 2/3 full. Bake for 18-20 minutes until a toothpick inserted in the middle comes out clean. Allow cupcakes to cool in the pan 5-10 minutes. Place on a cooling rack to continue to cool completely. For the frosting 16 tablespoons unsalted butter, at room temperature, I prefer European butter like Plugra 4 cups confectioner's sugar, sifted 1/8 teaspoon kosher salt 1 teaspoon vanilla extract 1 teaspoon whole milk 1/2 cup Blue Moon In the bowl of a stand mixer fitted with a paddle attachment, cream the butter for 1-2 minutes, until light and fluffy. Add the salt to the confectioner's sugar, whisk together. On low speed, slowly add 1/2 of the confectioner's sugar to the mixing bowl. Slowly add the vanilla, milk and Blue Moon. Once incorporated, add the remaining confectioner's sugar, stopping the scrape down the bowl if necessary. When all the ingredients are fully combined turn the mixer on medium-high speed and beat for 5-7 minutes until the frosting is light and fluffy. Transfer the frosting to a pastry bag and swirl onto cupcakes. Source: Adapted from The Cupcake Diaries 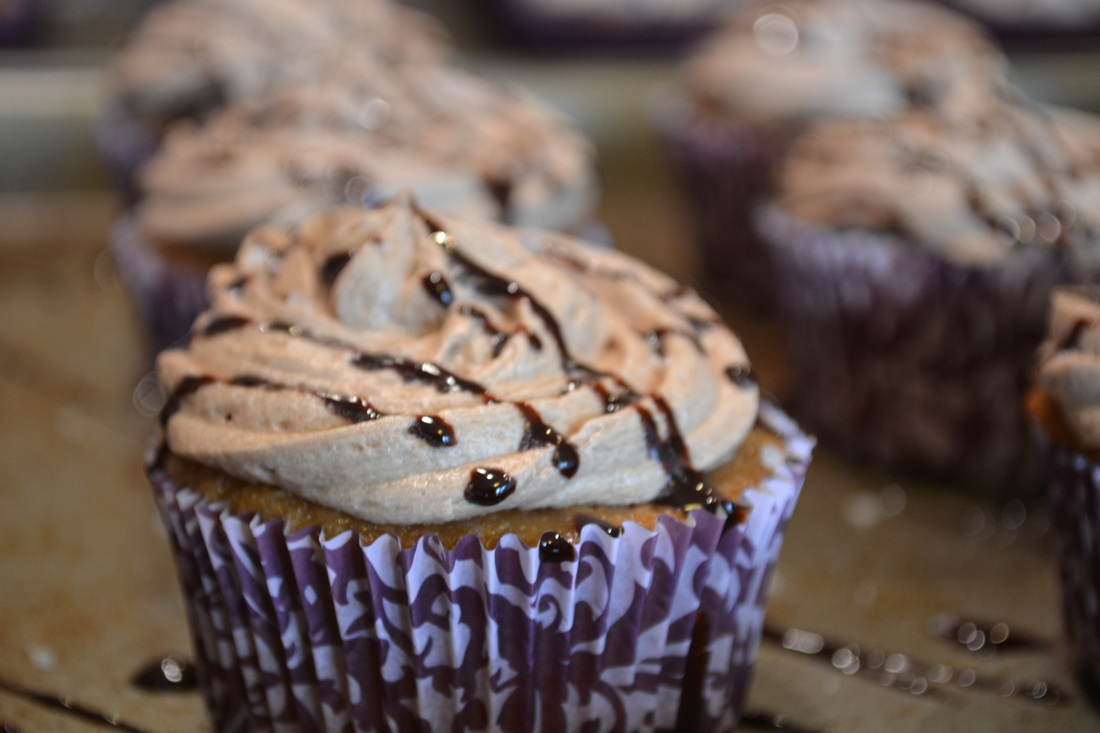 I'm about to make a confession. A confession that may get me beaten by 90% of the people I know. I don't like chocolate cake. There. I said it. It's out there. I like chocolate candy, chocolate pudding and sometimes chocolate ice cream, but not chocolate cake. That's why I'm super excited to share with you my little creation I call a Chocolate Milk Cupcake! It tastes like, well, chocolate milk! Super moist with a hint of chocolate in the cake topped with buttercream that not only has chocolate milk in it, but also chocolate syrup. To finish it off I top it with a bit of that fleur de sel that I love so much to give you that salty sweet satisfaction! When I first started getting serious about cupcake baking I came across an incredibly delicious eggnog cupcake on Annie's Eats. Everyone, everywhere loved these cupcakes. After the holidays passed I was wondering how I could tweak this recipe a bit and make it a year-round favorite. I swapped out the eggnog for chocolate milk, made some other additions and this little baby was born! 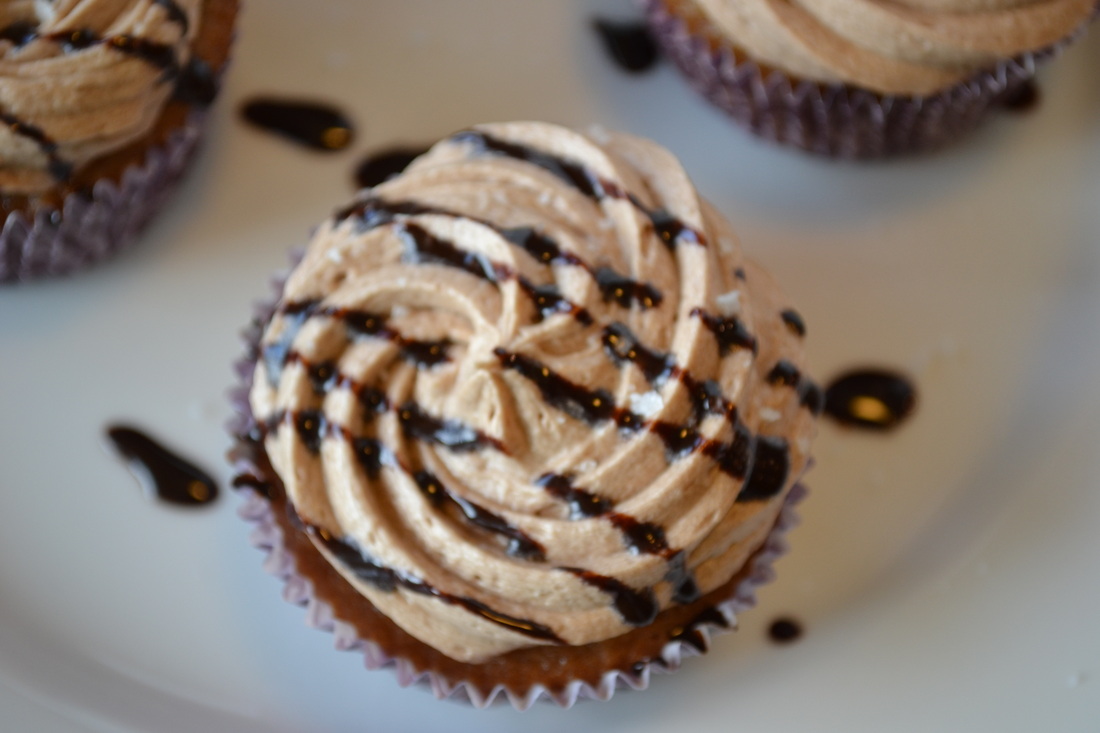 Chocolate Milk Cupcakes with Chocolate Milk Buttercream Makes 12-14 cupcakes For the cupcakes 1 1/3 cups all purpose flour ** 1/4 tsp baking soda 1/2 tsp baking powder 1/2 tsp salt 1/4 cup Creme de Cacao 1 cup chocolate milk - whole milk variety 1/4 cup canola oil 1 tsp vanilla extract 1 cup sugar Preheat oven to 350. Line a standard cupcake pan with cupcake liners. Set aside. In a medium bowl, sift together flour, baking soda, baking powder and salt. Set aside. In the bowl of a stand mixer fitted with a paddle attachment mix together Creme de Cacao, chocolate milk, canola oil, vanilla and sugar. Beat on medium speed until well blended. Gradually add dry ingredients and mix on low speed until just combined. Scoop the batter into cupcake liners filling them about 2/3 full. Bake for 22-24 minutes, or until a toothpick inserted in the center comes out clean. Allow to cool in the pan for about 5 minutes before transferring to a cooling rack to cool completely. ** These cupcakes can be made Gluten Free by using 1 1/3 cups high-quality Gluten Free Flour Mix. I use Gluuteny Basic Flour Mix from Gluuteny. For the Fleur de Sel Buttercream Makes enough to frost 12-14 cupcakes 1/2 cup unsalted butter, at room temperature (I use Plugra European butter) 2 cups powdered sugar, sifted 2 tbsp chocolate milk 1 tbsp vanilla 2 tbsp chocolate syrup 1/8-1/4 tsp fleur de sel Place the butter in the bowl of a stand mixer fitted with a paddle attachment. Cream the butter for about 1 minute. Add 1 cup of confectioner's sugar and mix on low until well combined. Add chocolate milk, vanilla, chocolate syrup and fleur de sel, mixing for about 30 seconds. Add the remaining 1 cup of confectioner's sugar and mix until just incorporated. Increase mixer speed to medium-high and beat until light and fluffy, about 5-7 minutes. Transfer frosting to a large pastry bag fitted with a large tip and swirl frosting onto cupcakes. Drizzle with additional chocolate syrup. 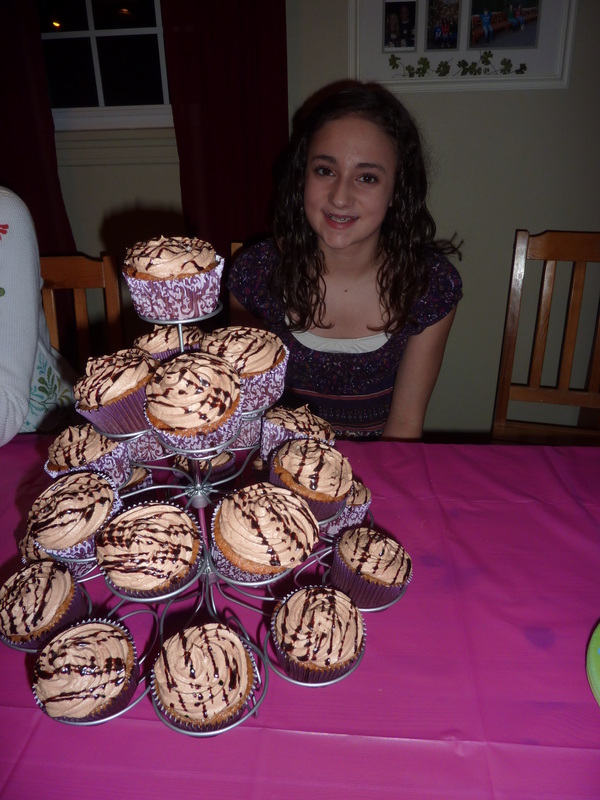 Sweet E - A happy recipient of Chocolate Milk Cupcakes for her 12th birthday!  Cupcakes. What can be said about cupcakes? I love cupcakes. I love simple vanilla cupcakes just as much as I love gourmet flavors and combinations. This particular cupcake is ranking high up on my list of favorites. Salted caramel cupcakes. How amazing do these sound?!?! They start with a home made caramel sauce that is added into a basic vanilla cake recipe. The frosting is a simple buttercream made with European butter and more of that homemade caramel sauce. To finish this beauty off I drizzled some of the caramel sauce on top. A work of art! A tasty little indulgence! AND, these just happen to be my birthday cupcakes! Both baking and eating these cupcakes was a true treat for me! Now, all that being said, two things happened to me while this whole cupcake experience was going on. The first thing was: I turned 38. Not an age to be considered 'old' by any stretch of the imagination. Heck, I still feel like a 23-year-old! The problem is, I'm NOT 23 anymore. The big, proverbial 4-0 is sneaking up just around the corner and it is time to really start taking better care of my health. The other thing that happened to me is I stepped on the scale and saw a weight I haven't seen in over a year...and not in a good way. Last year at this time I was 110% dedicated to Weight Watchers and I managed to take off 15 pounds and keep most of it off! I felt great! Seeing the scale the other day...well...let's just say between the birthday and the scale I decided I HAVE to get serious again and start eating better and exercising more. None of us are getting any younger and shorts season is going to be here before we know it. Oh yeah, and that pesky little Pittsburgh Marathon Relay Team I signed up for. Yikes! I have to run 5.5 miles in less than 9 weeks! So, Butter Fans, to that end, the cupcake blogs are going to be slowing down for a bit while I focus on some healthier foods. No fear though, I only post the yummiest of yummy recipes! 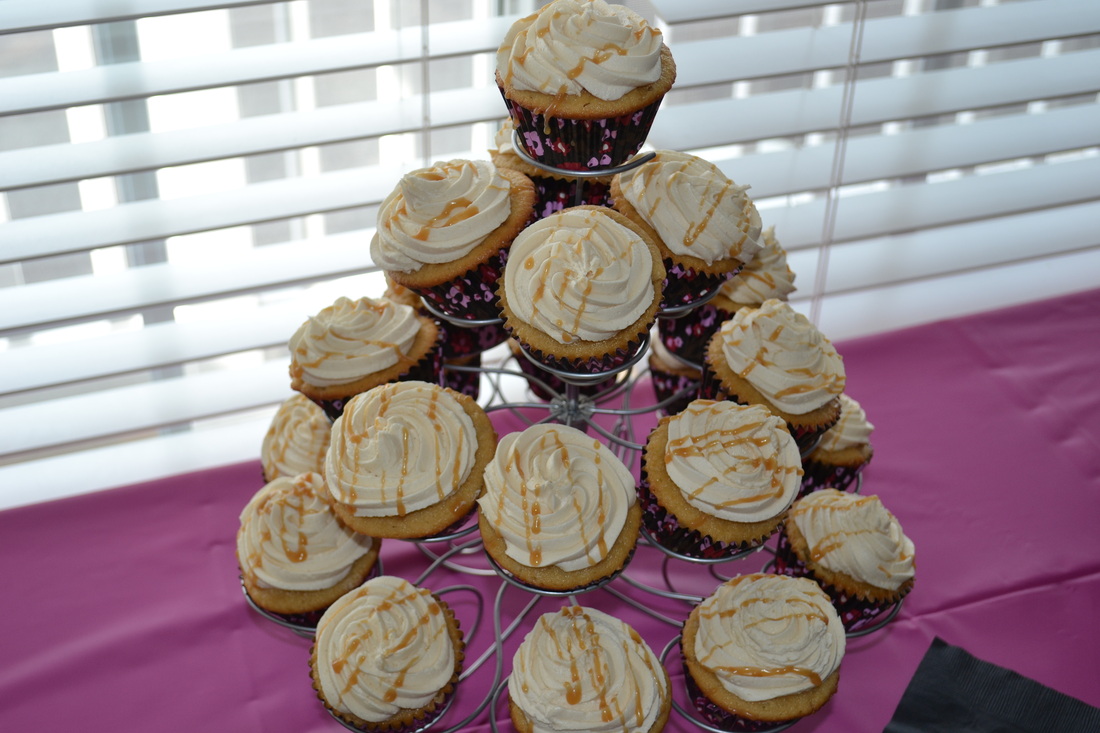 Salted Caramel Cupcakes Makes about 24 cupcakes For the caramel sauce 2 cups sugar 1 tablespoon water 12 tablespoons unsalted butter, at room temperature 1 teaspoon vanilla extract 1 cup heavy cream, at room temperature Pour sugar and water into a large saucepan. Heat on medium-high heat and stir constantly until the sugar completely liquifies. Stir constantly being careful not to burn the sugar. After all the sugar has dissolved, add the butter and vanilla extract to the saucepan and mix thoroughly. Once the butter has melted and the butter and sugar are completely mixed, remove from heat and, using a whisk, slowly whisk in the heavy cream. Be aware the mixture will bubble violently for a few seconds. Continue whisking until you reach a beautiful golden brown caramel color. If the mixture seizes into any small, hard chunks, place the pan over medium-low heat and continue to whisk until the mixture smooths out. This may take a while, but it will come together eventually. Set aside and let cool completely. ** You can make the caramel the night before you need it and place it in the refrigerator until you are ready for it. For the cupcakes 2 1/2 cups all-purpose flour 2 1/2 teaspoons baking powder 1/4 teaspoon salt 8 tablespoons unsalted butter, at room temperature 1 3/4 cups sugar 2 large eggs, at room temperature 2 1/4 teaspoons vanilla extract 1 1/4 cups whole milk, at room temperature 1 cup caramel sauce Preheat the oven to 350. Line 2 standard cupcake pans with liners. Set aside. In a medium bowl sift together the flour, baking powder and salt. Set aside. Place the butter in the bowl of a stand mixer fitted with a paddle attachment. Cream the butter for about 1 minute. Add the sugar and beat on medium speed until well incorporated, about 3-5 minutes. Add the eggs, one at a time, mixing slowing after each addition. Add the vanilla extract. Reduce the mixer speed to low, then gradually add one third of the flour mixture, followed by one third of the milk, beating until well incorporated. Add another third of the flour mixture, followed by another third of the milk. Stop to scrape down the bowl, as needed. Add the remaining flour mixture followed by the remaining milk and mix until just combined. Add the caramel sauce and mix slowly, swirling it into the batter, but not mixing it in completely. Scoop the batter into the prepared liners, filling about 2/3 full. Bake for 18-22 minutes until a toothpick inserted in the center comes out clean. Allow cupcakes to cool in pans for about 5 minutes before transferring to a wire rack to cool completely. For the Salted Caramel Buttercream
16 tablespoons unsalted butter, at room temperature (I prefer Plugra, European butter) 4 cups confectioners' sugar, sifted 1 teaspoon whole milk 1 teaspoon fleur de sel (you can substitute kosher salt) 1/2 cup caramel sauce Place the butter in the bowl of a stand mixer fitted with a paddle attachment. Cream the butter for about 1 minute. Add 2 cups of confectioner's sugar and mix on low until well combined. Add milk, fleur de sel and caramel sauce, mixing for about 30 seconds. Add the remaining 2 cups of confectioner's sugar and mix until just incorporated. Increase mixer speed to medium-high and beat until light and fluffy, about 5-7 minutes. Transfer buttercream to a pastry bag fitted with a wide tip and frost cupcakes. Drizzle caramel sauce on top. 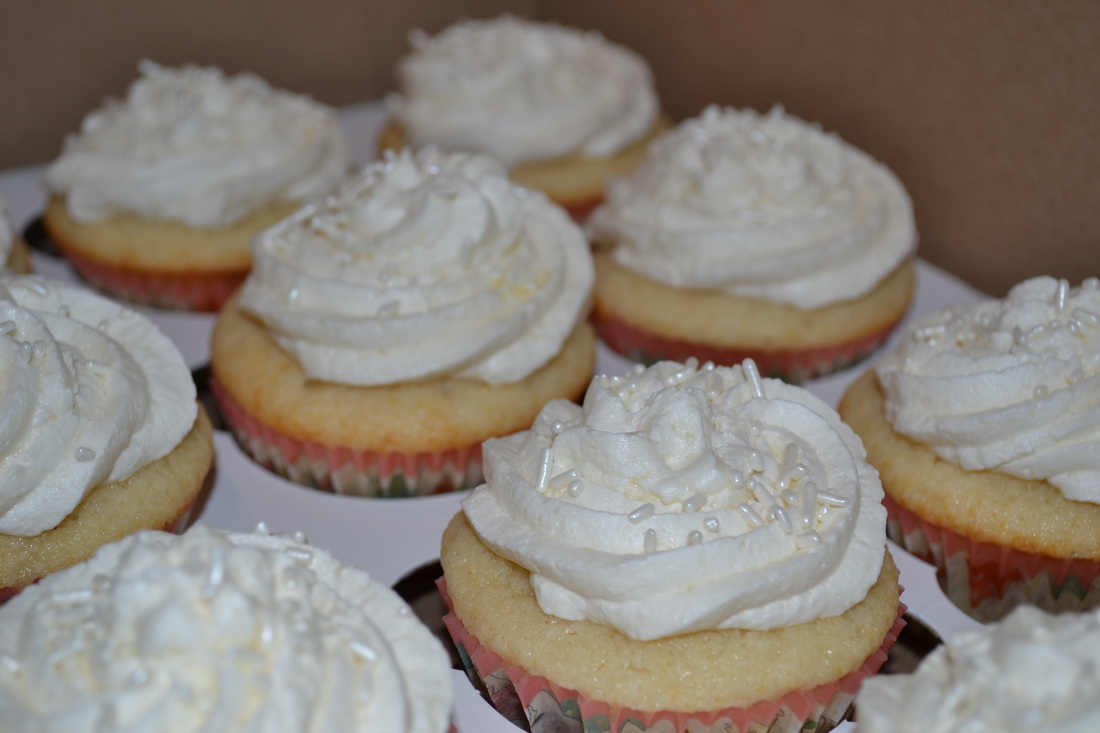 Strawberries and champagne. Is there a more perfect combination of flavors that say love and romance? I don't think so! I was so excited when my friend asked me to bake up a batch of these yummy, romantic cupcakes to present to his wife on Valentine's Day. Would I be able to do it? Yes! What an honor! This recipe is another one from The Cupcake Diaries by the sisters from Georgetown Cupcake. I got this book as a Christmas gift from my mother-in-law and I was really excited to make this recipe for our New Year's Eve celebration. I followed the recipe and made these in mini-form. Though they were ok, I wasn't completely happy with them. This time around I made these in the standard cupcake pan and tweaked the frosting just a bit - I kept the ingredients exactly the same but added them in the same order/technique that I usually do. One thing I found a bit odd about the cupcake recipe directions is that it called for room temperature eggs and milk, but not butter. I did as directed and used cold butter and this batch came out amazing! I was so proud to present these to my friends! They were a hit all-around and a perfect little treat on Valentine's Day! 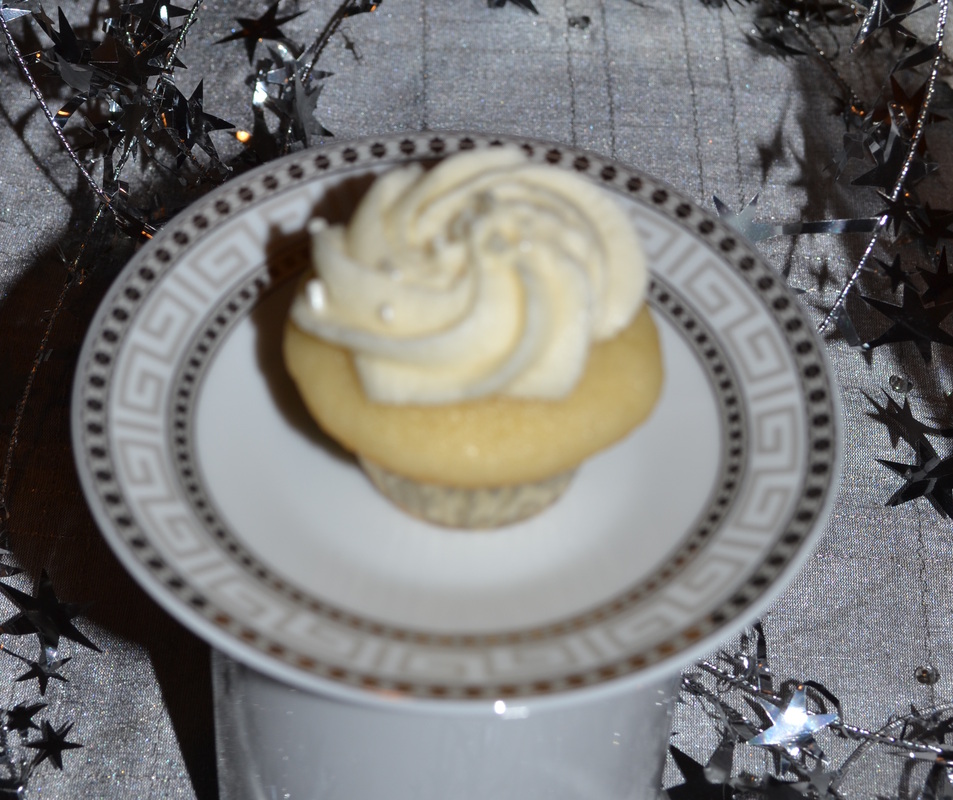 Here is a picture of the adorable mini cupcakes I made for New Year's Eve! Strawberry Champagne Cupcakes with Champagne Buttercream Makes 20-24 cupcakes For the cupcakes 1/2 cup fresh strawberries, diced 1/2 cup good champagne 2 1/2 cups all-purpose flour ** 2 1/2 teaspoons baking powder 1/4 teaspoon salt 8 tablespoons unsalted butter 1 3/4 cups sugar 2 large eggs, at room temperature 2 1/2 teaspoons vanilla extract 1 1/4 cups whole milk, at room temperature Preheat the oven to 350. Line 2 standard cupcake pans with liners. Set aside. Soak the strawberries in the champagne. Set aside. In a medium bowl sift together the flour, baking powder and salt. Set aside. Place the butter in the bowl of a stand mixer fitted with a paddle attachment. Cream the butter for about 1 minute. Add the sugar and beat on medium speed until well incorporated. Add the eggs, one at a time, mixing slowing after each addition. Add the vanilla extract to the milk in a liquid measuring cup. Reduce the mixer speed to low, then gradually add one third of the flour mixture, followed by one third of the milk mixture, beating until well incorporated. Add another third of the flour mixture, followed by another third of the milk mixture. Stop to scrape down the bowl, as needed. Add the remaining flour mixture followed by the remaining milk mixture and mix until just combined. Drain the strawberries of the excess champagne and gently fold the strawberries into the batter, just until incorporated. Scoop the batter into the liners, filling about 2/3 full. Bake for 18-22 minutes until a toothpick inserted in the center comes out clean. Allow cupcakes to cool in pans for about 5 minutes before transferring to a wire rack to cool completely. ** These cupcakes can be made Gluten Free by using 2 1/2 cups high-quality Gluten Free Flour Mix. I use Gluuteny Basic Flour Mix from Gluuteny. For the Champagne Buttercream
16 tablespoons unsalted butter, at room temperature (I prefer European butter, such as Plugra) 4 cups confectioner's sugar, sifted 1 teaspoon vanilla extract 1 teaspoon whole milk 1/8 teaspoon salt (I use kosher) 1/2 cup good champagne Place the butter in the bowl of a stand mixer fitted with a paddle attachment. Cream the butter for about 1 minute. Add 2 cups of confectioner's sugar and mix on low until well combined. Add vanilla, milk, salt and champagne, mixing for about 30 seconds. Add the remaining 2 cups of confectioner's sugar and mix until just incorporated. Increase mixer speed to medium-high and beat until light and fluffy, about 5-7 minutes. Transfer frosting to a large pastry bag fitted with a large tip. Swirl frosting onto cupcake and enjoy! Source: Slightly adapted from The Cupcake Diaries |
AuthorPittsburgh area mom striving to provide clean, healthy, REAL food for her family! Categories
All
Archives
September 2014
|
 RSS Feed
