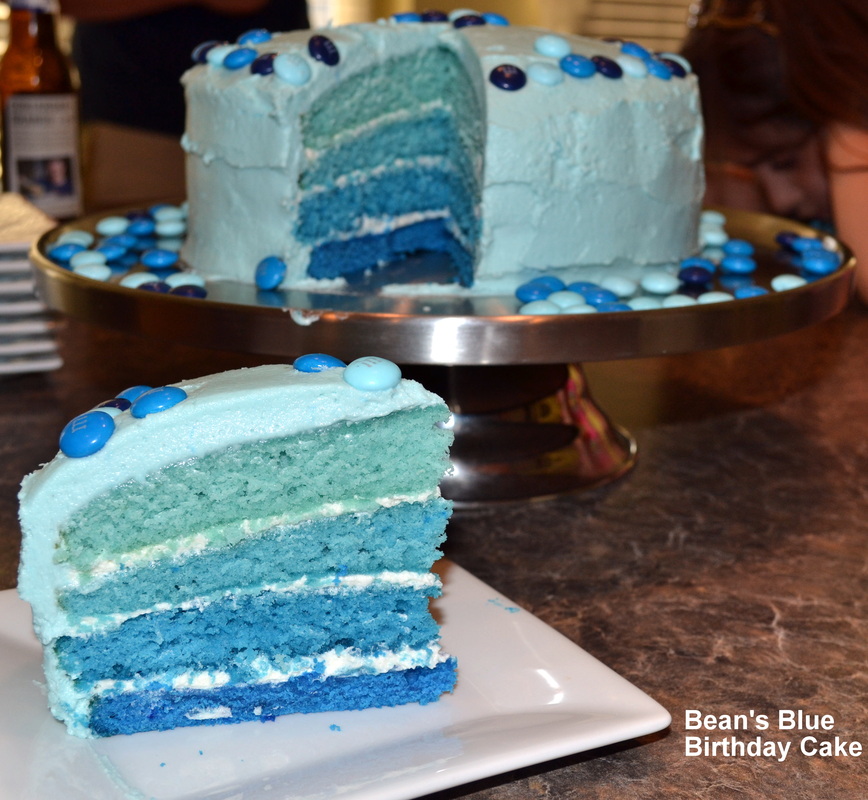
Yesterday my baby girl, Brecken, turned 4 years old. I can't believe my baby is 4 already!! Brecken had a bit of a tough start to life. Lots of visits to Children's Hospital in the first few years...lots of visits with therapists....and lots of hard work. Yesterday on her 4th birthday we celebrated no longer needing to thicken her liquids for fear of aspiration, a huge advancement in her speech and finally being potty-trained! Yes, our little Bean has come a long way and we are so proud of her! One of Brecken's favorite things in life is the color blue (much to her purple-loving-sister's disapproval). Her other favorite thing is M&M's (big sister approves of those!) To that end, I decided an over-the-top blue and M&M cake was perfect for her! I have seen these multi-colored layer cakes all over the blogosphere and thought I'd give it a try. I think it came out pretty well, though I did learn a lot through this process - I'll share my tips with you on the way through the tutorial I've created for you. The first thing I did was make a batch of my favorite vanilla cupcake batter. 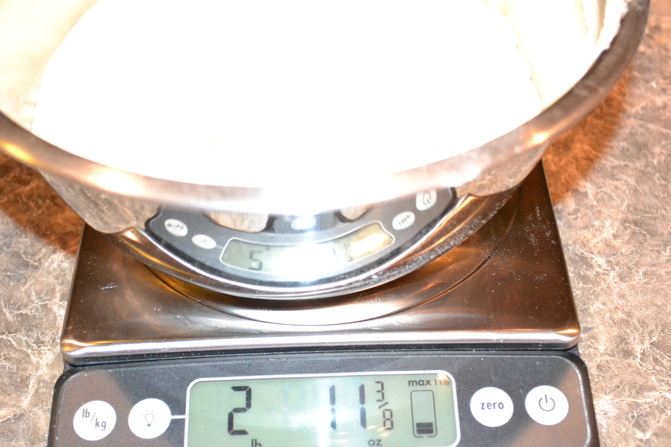 Weigh the total batter amount. 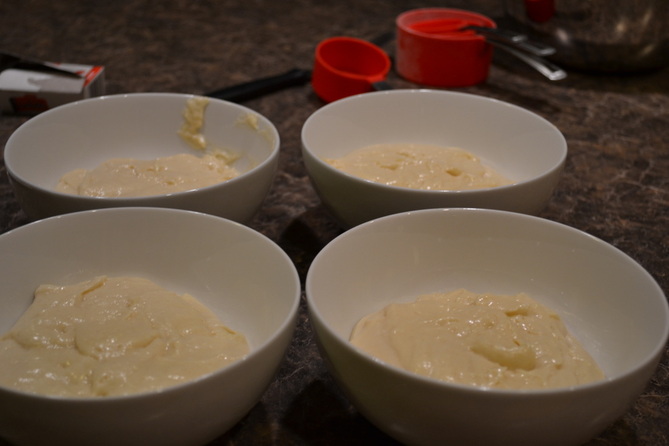 Next, I divided the batter evenly into 4 smaller bowls. This is where the kitchen scales comes in very handy. This is also where I learned I need to invest in some nice mixing bowls! 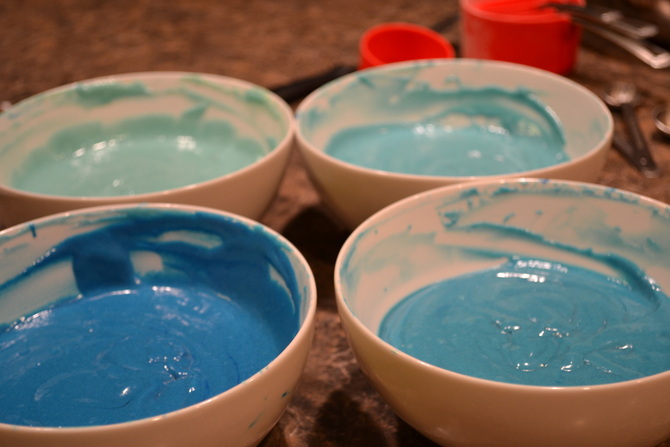 Then, using Wilton Food Coloring Gels I colored each of the bowls of batter different shades of blue. The lightest one used 3 toothpicks worth, the next one was 4 toothpicks, then it was 5 and I think we used about 7 on the last one. Just keep adding gel until you reach your desired color. 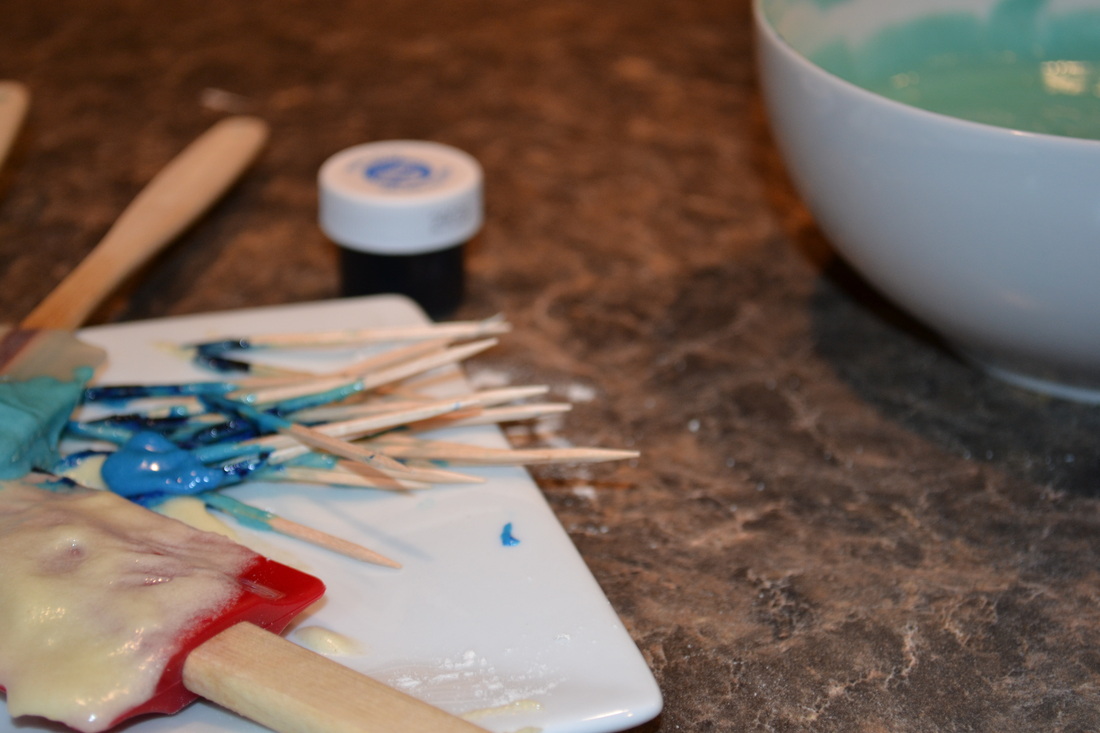
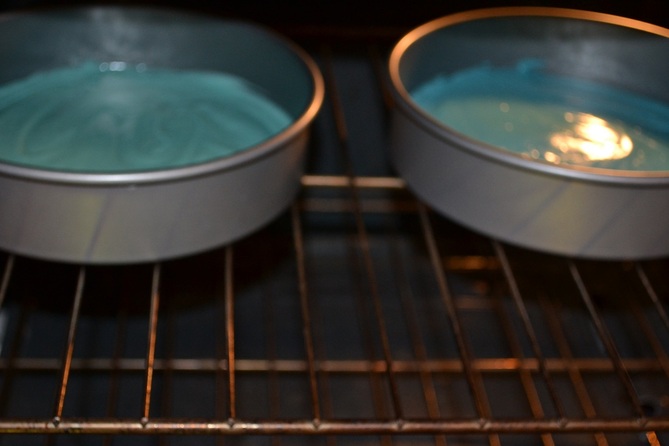 Place two of the batters into 8-inch round cake pans lined with parchment paper. Bake at 350 for about 14 minutes, or when a toothpick inserted in the middle comes out clean. When the first two were baked and cooled slightly I removed them from the pans and placed them on a cooling rack to cool completely. Bake the last two colors as instructed above. 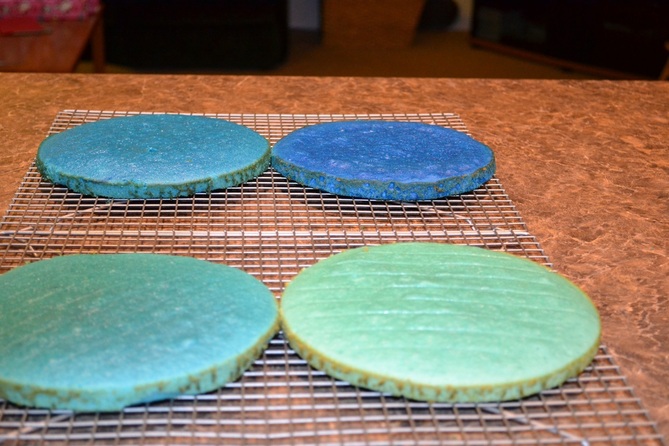 You should end up with 4 thin cake layers. I baked my cakes the night before so I wrapped each layer tightly in plastic wrap and set them out at room temperature until I was ready to use them. Before assembling the cake make a batch of basic vanilla buttercream. I used this recipe: 3 sticks of unsalted butter, softened (I use Plugra) 6 cups of powdered sugar 1/4 tsp kosher salt 6 Tbsp heavy cream 2 Tbsp vanilla extract In the bowl of a stand mixer fitted with a paddle attachment, cream the butter for 3-4 minutes, until light and fluffy. Add the salt to the confectioner's sugar, whisk together. On low speed, slowly add 1/2 of the confectioner's sugar to the mixing bowl. Slowly add the heavy cream and vanilla. Once incorporated, add the remaining confectioner's sugar, stopping the scrape down the bowl if necessary. When all the ingredients are fully combined turn the mixer on medium-high speed and beat for 5-7 minutes until the frosting is light and fluffy. 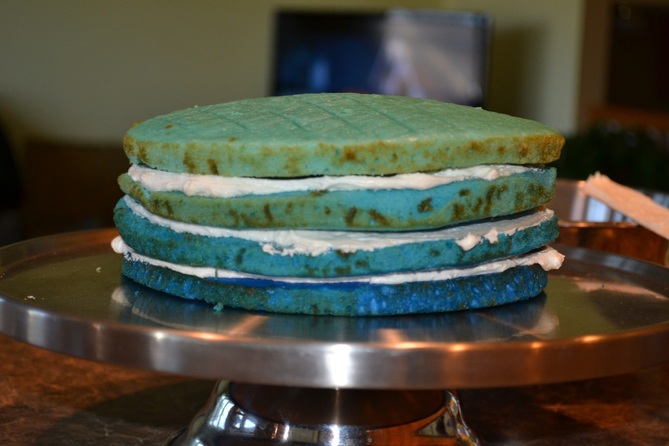 When ready to assemble your cake, place the darkest color on the bottom and spread a layer of frosting on top. Continue to layer cake and frosting until you have 3 layers of frosting in between the 4 layers of cake. Here's where I started to figure out what to do better next time. First of all, I would probably assemble the cake on a cake board and a piece of parchment. This would allow to easily clean up the excess frosting and transfer the cake to the cake stand when ready to serve. Second, I was worried that I would have enough frosting so I went a little thin on each layer. In the end this recipe had MORE than enough so I would have put a good amount more frosting between each layer. Third, I would have used a knife to even out the top layer. It didn't look too crooked to me at this point but I later learned it really was! 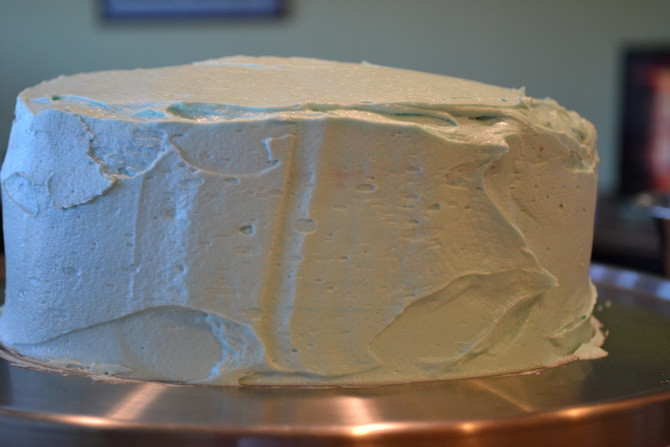 At this point what I did was use my blue food gel coloring again to tint the frosting to the shade of blue I wanted. I proceeded to frost the cake. In the future what I will do is put a 'crumb coat' on my cake first. To do this you simply spread a thin layer of frosting (white or colored) on your cake - it's ok if there are crumbs in the frosting. Place the cake in the refrigerator for about 30 minutes until the frosting is set. After 30 minutes you can proceed to frost your cake. From what I've read online this makes a huge difference and I wish I'd done it. All in all, my cake came out ok. But I'm really excited to use the tricks I've learned along the way on my next cake!  The last thing I did was decorate the cake with lots of M&Ms! 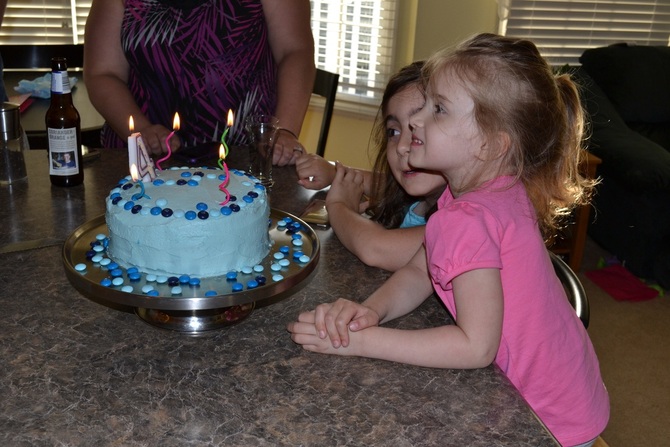 The birthday girl in all her blue glory! 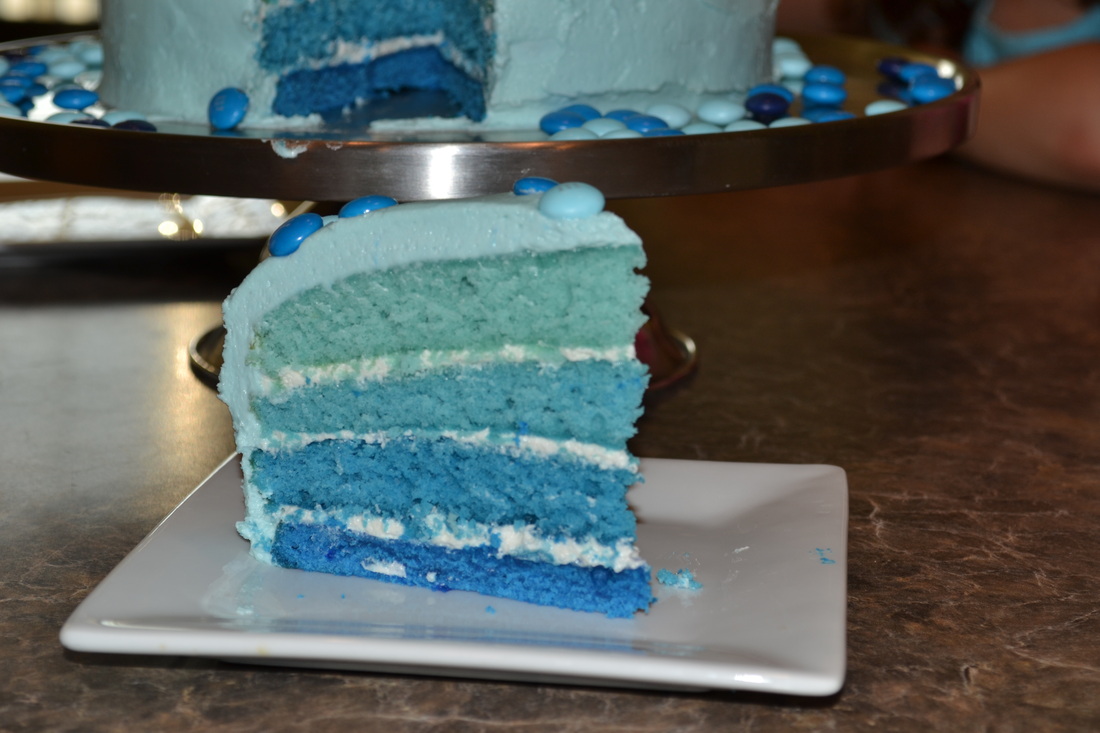
Thank you all for allowing me to practice my cake decorating (and photography!) on you!
5 Comments
pap
6/14/2012 08:11:41 am
What a wonderful cake for a wonderful young lady Happy Brithday Brecken Pappy and Nanny Love you.
Danielle
6/14/2012 10:27:27 am
Looks great! A layered cake (I think it was pink lemonade flavored) was on Better Homes & Gardens a few months ago too. This looks just as neat, if not better!
nan
6/14/2012 10:45:57 am
her nan likes blue too
Andi
6/15/2012 06:17:02 am
That looks awesome! Sorry we missed it. So proud of her! Alayna is requesting it in pink for her birthday!
Shannon Bernotas
6/15/2012 12:22:27 pm
Awesome! I love the shades of blue! And her name is beautiful I <3 it! Leave a Reply. |
AuthorPittsburgh area mom striving to provide clean, healthy, REAL food for her family! Categories
All
Archives
September 2014
|
 RSS Feed
