|
Confession time: I had a piece of my daughter's birthday cake today. I was really looking forward to it. It looked great and smelled sinfully sweet. So after singing Happy Birthday to my sweet 9-year-old I indulged in my first piece of (store bought) birthday cake in quite some time. It was fine...maybe even good, but so sweet. Sickeningly sweet actually. So sweet that I actually have no desire to have a second piece. In no way am I complaining about the cake or feeling guilty for eating it, but rather I'm feeling victorious that I just may have (finally!!) kicked my sugar addiction! The 'old me' would have eaten at least 3 pieces of cake...per day...til it was gone. Yaaay me! Now that I've got that off my chest and out of my system, I'm ready to start the 10 Days of Real Food Pledge tomorrow! If you have decided to join me, don't forget to sign up on Lisa Leake's website so you can earn your free prize too! One of my go-to Real Food breakfasts is Overnight Oatmeal. I've had Overnight Oatmeal for breakfast most mornings for more than a year now. I expected myself not to want it during the long, cold (very cold in PA!) winter months but I ended up craving it just as much in February as I do in July! It's super easy to make, portable, versatile, filling, healthy....it's pretty much the perfect breakfast! 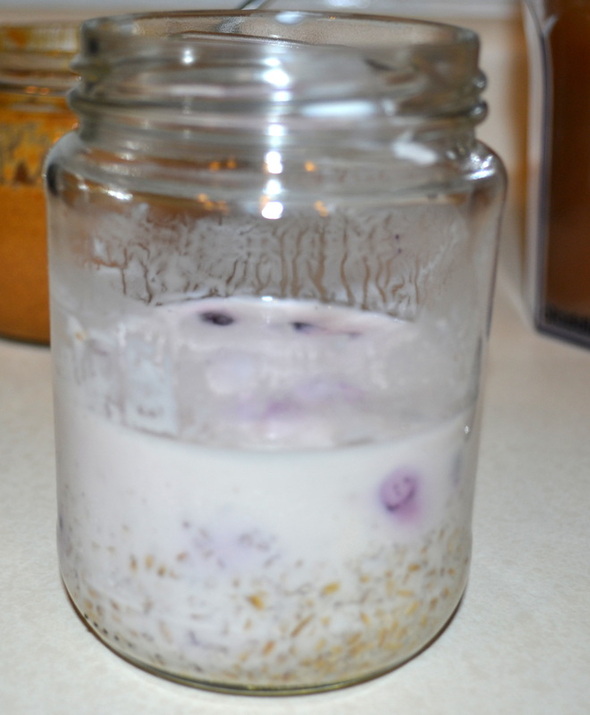
Overnight Oatmeal Serves 1 1/4 cup steel cut oats 1/4 cup whole milk 1/4 cup plain, whole milk yogurt 1/4 cup berries 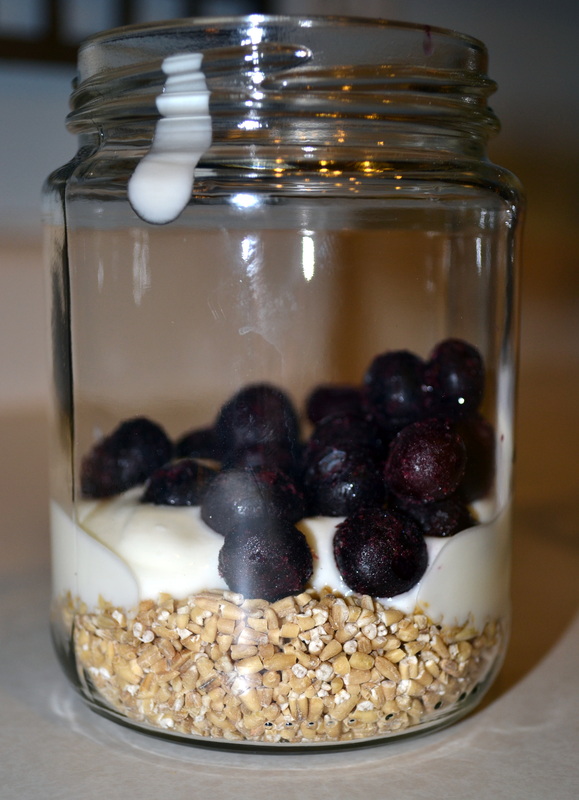
Place all ingredients in a bowl or jar. Stir until combined. 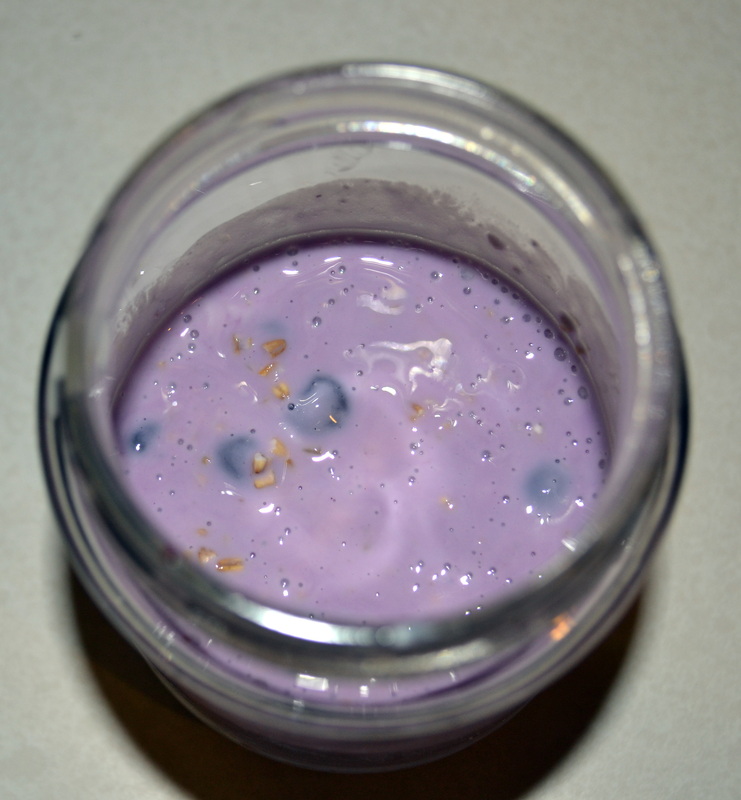
Cover and refrigerate overnight. Eat within 2-3 days for best quality. Top with a dollop of almond butter or other nut/seed butter. 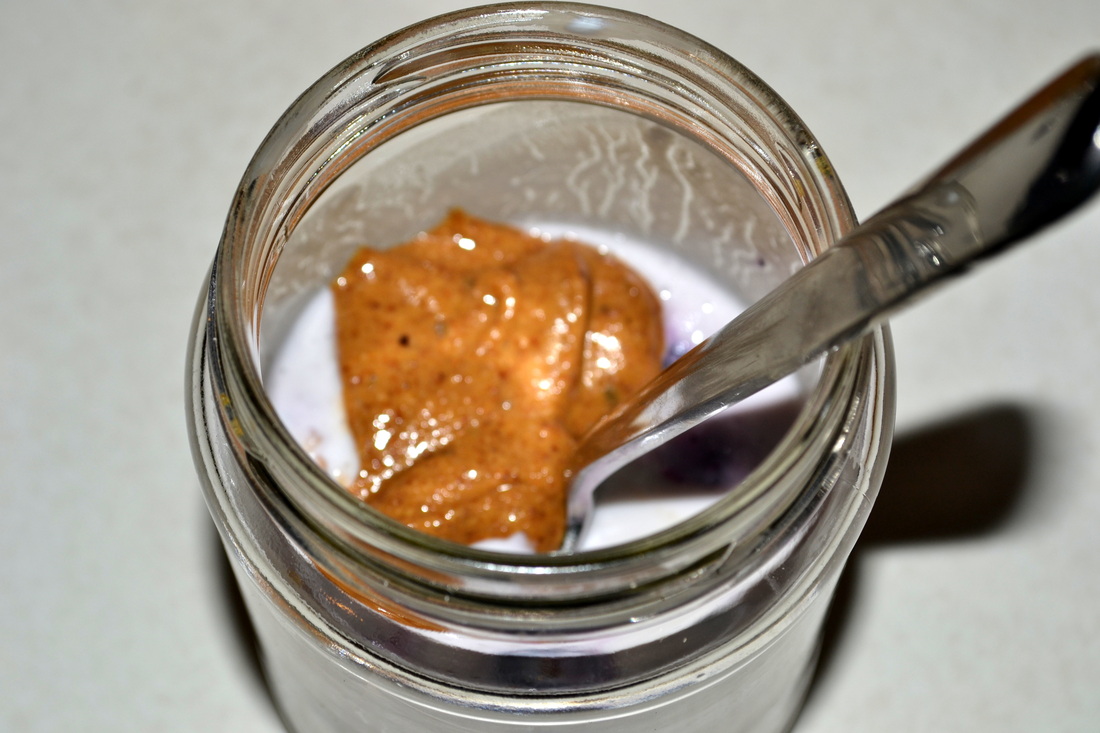
0 Comments
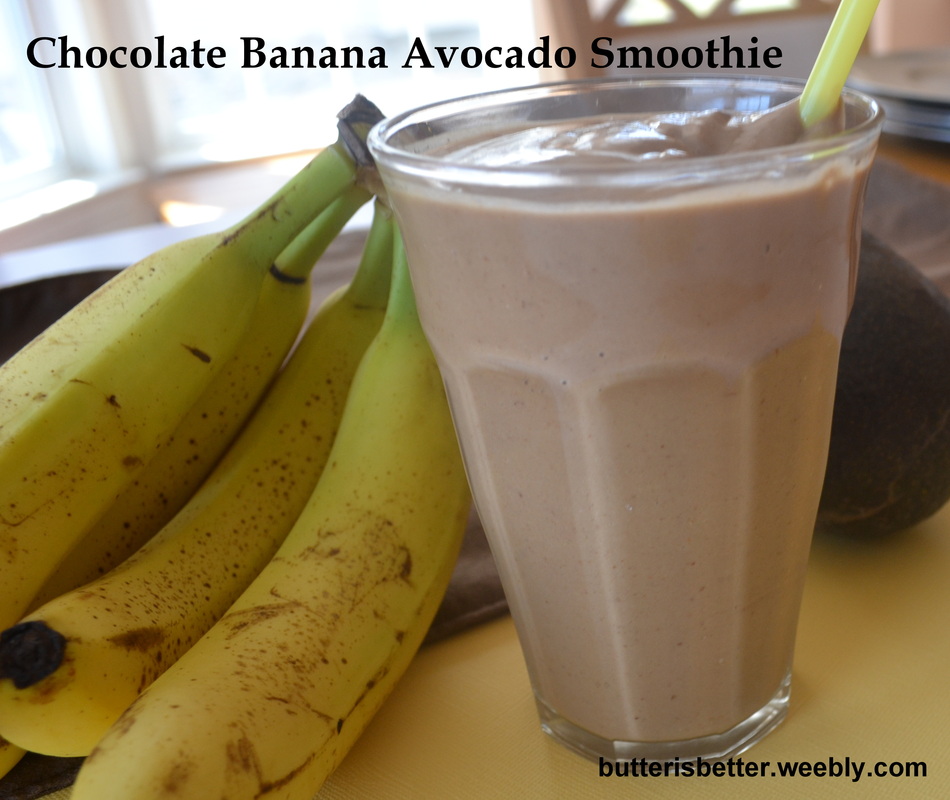
Happy Monday! I hope everyone had a great weekend! If you overindulged a bit (and don't we all?) I have the perfect recipe for you! This is another recipe that features my very favorite fruit: the avocado. Over the past few years I have developed a lower and lower tolerance to milk (and sadly, milkshakes), so I've been enjoying less and less smoothies and milkshakes. I had read many times that avocados are a great addition to shakes and smoothies to get the creaminess that is missing from non-dairy versions. I had never actively searched for a recipe but once I came across this recipe on Pinterest and knew this was one to try! Lots of smoothies look healthy but are secretly filled with tons of sugar and calories. What I like about this smoothie is that it is dairy-free (yaaay!), contains 1 1/2 servings of fruit, is sweetened with honey, not sugar and has tons of protein. This drink totally disguised itself as a chocolate milkshake to my two princesses! JP liked it and Bean loved it. My little Bean definitely acquired Mommy's avocado obsession :) It's chocolate-y and creamy and sweet, but not too sweet. The avocado is there, but I swear you can barely taste it. It's a great way to sneak a lot of healthy things into your kids! 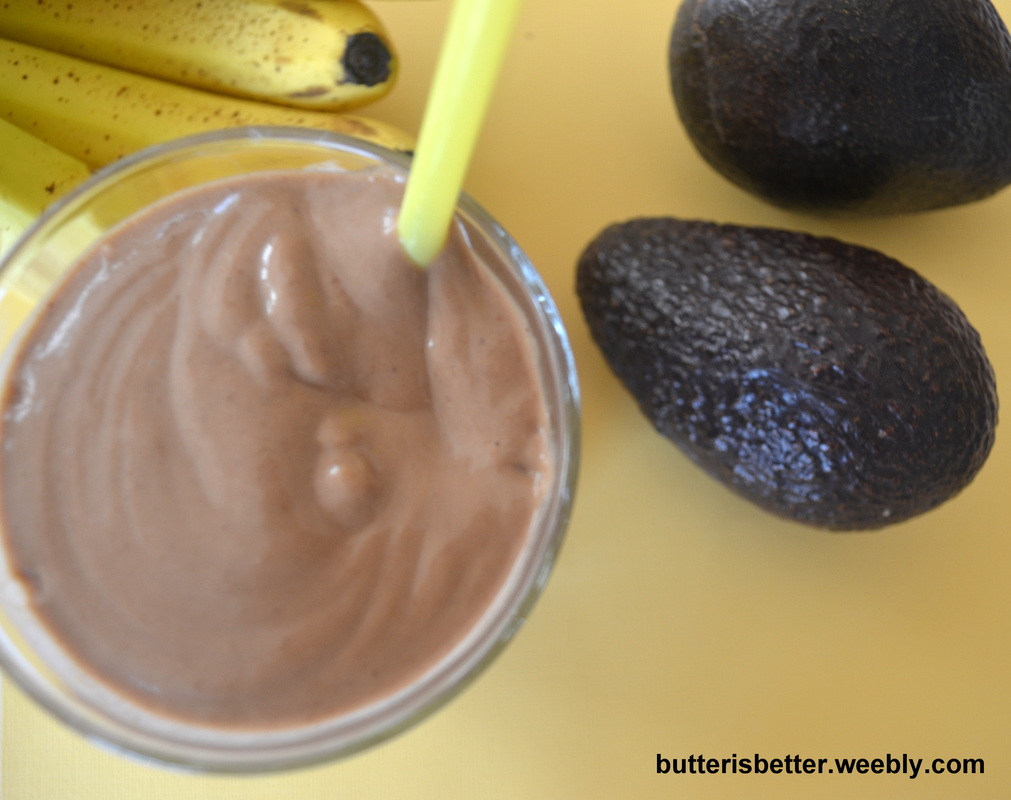
Chocolate Banana Avocado Smoothie Serves 2 1 cup unsweetened almond milk 1/2 cup crushed ice 1 ripe banana 1 tablespoon honey (you can use dates if you want to make this vegan) 1/2 ripe avocado 2 tablespoons natural cocoa powder 2 tablespoons almond butter (make your own here!) 1 1/2 teaspoons ground flax seed Combine all ingredients in a blender until smooth, about 30 seconds. Source:
Adapted from Against All Grain 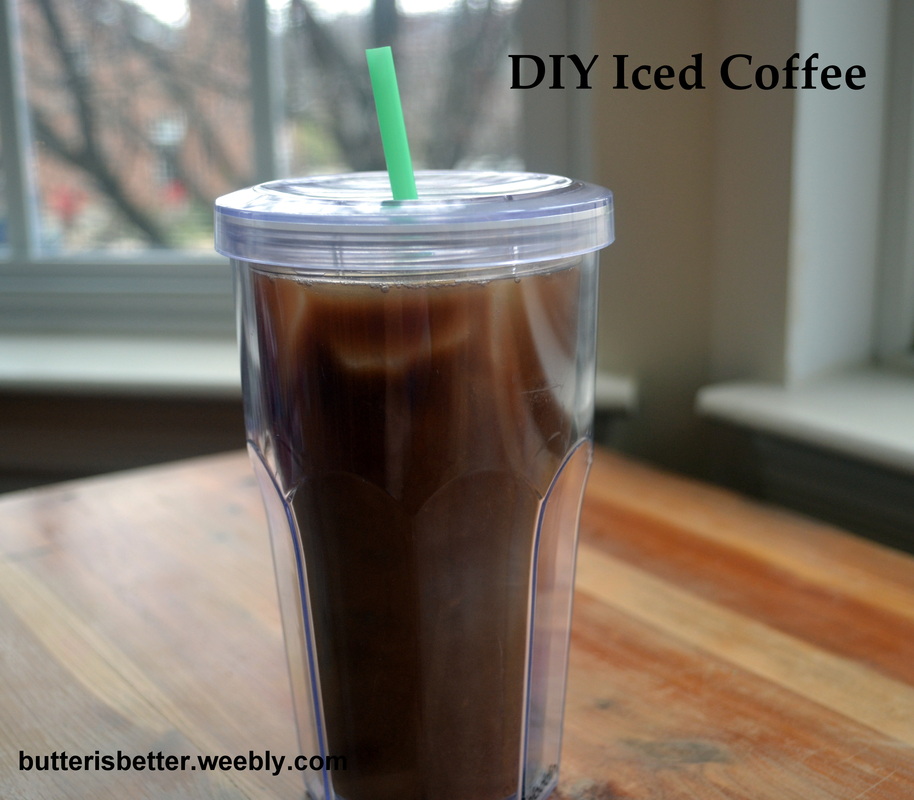
Do you see the picture above? Do you know what that is a picture of? Freedom! Er...Iced Coffee! But, iced coffee that I made by myself, at home, for a fraction of what it costs at a coffee shop! To me, that is sweet coffee freedom! I am a coffee drinker in that I have to have a cup (sometimes 2) of coffee every day or else I end up with a dreaded caffeine-induced headache. I hate that I'm a slave to coffee, but I accept it. I've tried a few times to give coffee up over the summers because, quite honestly, who wants a hot cup of coffee when it's 80 degrees at 10:00 am? Giving up coffee never really worked for me. A few years ago I discovered iced coffees at the coffee shops around town. Genius! It's coffee. It's cold. It's refreshing. It's perfect for summer! This great find came with a few problems - 1) Buying an iced coffee every day is not budget-friendly 2) Getting to a coffee shop every day is not convenient AT ALL and 3) Doesn't it seem like they put way too much ice in those drinks and not enough coffee? So, why not make it at home???? And I tried.... My first attempt was making a full pot of coffee in the morning and only drinking what my hubby and I wanted for the day, then dumping the leftover into a pitcher in the fridge. Then, the next day, then the next day...eh. I was still drinking warm coffee from the initial brew and the stuff in the fridge just tasted stale and nasty. Fail #1! My second attempt was to make espresso and get out the blender and make a sweet, frozen coffee concoction. Messy, too sweet, too many calories, too much work and just tasted off. Fail #2. My third attempt came when I purchase my beloved Keurig. One of the reasons I bought the Keurig was because I read about how you could make iced coffee by using them. Intriguing. How this was achieved was by brewing a strong blend of K-Cup using only 6 ounces of water. Once you had this potent little concoction in your coffee mug, you simply dumped it over a FULL cup of ice in an insulated cold beverage tumbler. Ok, let's try it. It worked....sort of. The taste was ok, but since you are pouring piping hot coffee over ice the ice melted instantly and left you with almost-cold coffee. Probably my best attempt up to that point, so we went with it for a while. I'm still comfortable calling this Fail #3. Then, along came this brand new technique I saw on Annie's Eats. I've never really heard of cold brewing coffee before. Looks complicated....or does it? The originally recipe makes quite a bit so I quartered the recipe down to yield just one pitcher and suddenly this was the easiest thing I'd ever done in the kitchen! It takes just a few minutes of planning and very minimal kitchen supplies (I think a kitchen scale is extremely helpful in this recipe). I usually throw a batch together at night and let it sit on the counter overnight. The next morning I strain it through a colander lined with a heavy-duty paper towel (I like Bounty) or a cheesecloth. Once it's strained I pop it in the fridge until I'm ready for it. You can add any kind of syrup or sweetener to your drink if you like, but I usually just add some almond milk to balance mine out. It keeps in the fridge for quite a while too - I've had my current batch in there for 3 weeks now (I'm blaming Mother Nature on her late arrival of spring here in PA). So, if you've been looking for a perfect recipe to make iced coffee at home, look no further - you have found it! 
DIY Iced Coffee Makes about 2 quarts 4 ounces bold/dark roast coffee, ground (this is where the kitchen scales comes in handy) 2 quarts cold, filtered water Add coffee grounds to a 2 quart pitcher. Fill about halfway with cold water. Stir to moisten grounds. Continue filling pitcher with water until it is full (this may be slightly less than 2 quarts). Cover and let sit at room temperature for 8 hours or overnight. 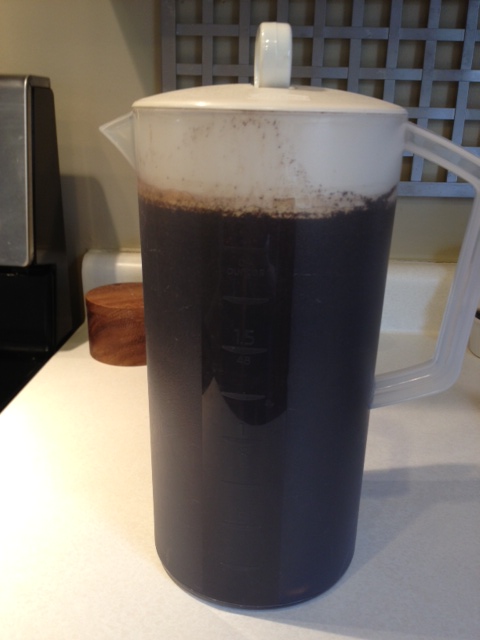
After 8 hours, pour coffee and grounds through a fine mesh sieve lined with a strong paper towel or cheesecloth. Push gently on the coffee grounds to extract all the liquid. Discard coffee grounds. Place coffee in a pitcher and store in the refrigerator until ready to use. Enjoy! Source:
Adapted from Annie's Eats, which was adapted from Pioneer Woman, who originally saw it on Imbibe Magazine 
Are you all ready for the upcoming holiday weekend? Based on what I see out my window I would guess said holiday would be Christmas....I would be wrong. Despite the temperatures lingering in the 20s/30s and the daily snowfall, we are actually coming up on Easter weekend. I always associate Easter with the start of Spring, flowers blooming, birds chirping, windows open and kids playing outside. Ahh.....this year I guess we'll all have to wait just a little bit longer. The dish I have for you today doesn't mind the weather. Nope, it's delicious any season for any reason! Carbo-licious, Cheesy-licious, with a teensy bit of healthy. That's how I would describe this dish. I've made this strata a few times over the past year and it's so indulgent that it just has to be saved for holidays around here! Health food this is NOT! This is a perfect dish to make for an Easter brunch because you need to prepare it the day before and bake it the next morning. Just toss it in the oven amid the Easter-morning chaos. It feeds at least 8 and looks quite impressive when brought to the table - which also makes it great for hosting overnight guests! Sometimes I add some roasted red peppers to it, which is great for Christmas morning since it adds an extra layer of flavor while upping the festive look to make it more Christmas-y. I have found that this monster of a casserole needs some extra lovin' time in the oven. We usually let it bake for 1 hour to 1 hour 15 minutes to make sure the eggs are cooked in the middle. Trust me, it's totally worth the wait! 
Spinach and Cheese Strata Serves 8-10 3 tablespoons unsalted butter 1 small onion, chopped 2 garlic cloves, minced 2 10-ounce packages frozen spinach, thawed and drained 1 teaspoon salt, divided 1/2 teaspoon ground black pepper, divided 8 cups ciabatta bread, cut into 1-inch cubes 6 ounces Gruyere cheese, grated 1 cup sharp cheddar cheese, grated 9 large eggs 2 3/4 cups milk Melt the butter in a large saute pan, over medium heat. Add the onions and cook until translucent, about 5 minutes. Add the garlic, 1/2 teaspoon salt and 1/4 teaspoon black pepper and cook for another minute. Add the spinach and cook until heated through, about another 2-3 minutes. Set aside to cool slightly. Combine cheese in a medium bowl. Set aside. Coat a 2 1/2 quart casserole dish with nonstick cooking spray. Place 1/3 of the bread cubes in the bottom of the dish. Top bread cubes with 1/3 of the spinach mixture. Top spinach mixture with 1/3 of the cheese mixture. Repeat the layering 2 more times, finishing with a layer of cheese on top. In a medium bowl place eggs, milk, 1/2 teaspoon salt and 1/4 teaspoon black pepper. Whisk to combine. Pour egg/milk mixture evenly over top of entire casserole. Cover and refrigerate overnight. Preheat oven to 350° F. While the oven is pre-heating, allow the strata to sit at room temperature. Bake uncovered for 60-75 minutes or until strata is no longer runny in the middle. 
Source:
Adapted from The Curvy Carrot, via Annie's Eats, as seen on Smitten Kitchen, originally from Gourmet, February 2003. 
In 1998 I spent 15 days in Rome, Italy visiting my mom's aunt and uncle - Zia and Zio. The food, or 'magic' created in Zia Lucia's kitchen inspired me in so many ways. I was fortunate enough to take my now-husband back with my family in 2001 for 10 days. Zia Lucia's cooking was still out of this world and now Mike could finally understand just what it was that we all loved about her, them, Rome...all of it! Though I didn't get to cook with her I will forever be influenced by the love she put into every single creation she brought out of that kitchen. The simple "Italian Orange" as I like to call it, is a perfect example of how she can put together a fantastic tasting dish out of things you already have just sitting around your kitchen. At first I'm sure this combination sounds a bit odd do you, but TRUST ME! It's so delicious, refreshing and healthy! You'll make it again and again. I've been enjoying it at home for so long and decided it just wasn't fair to keep this little gem to myself, so today I'm sharing it with you! 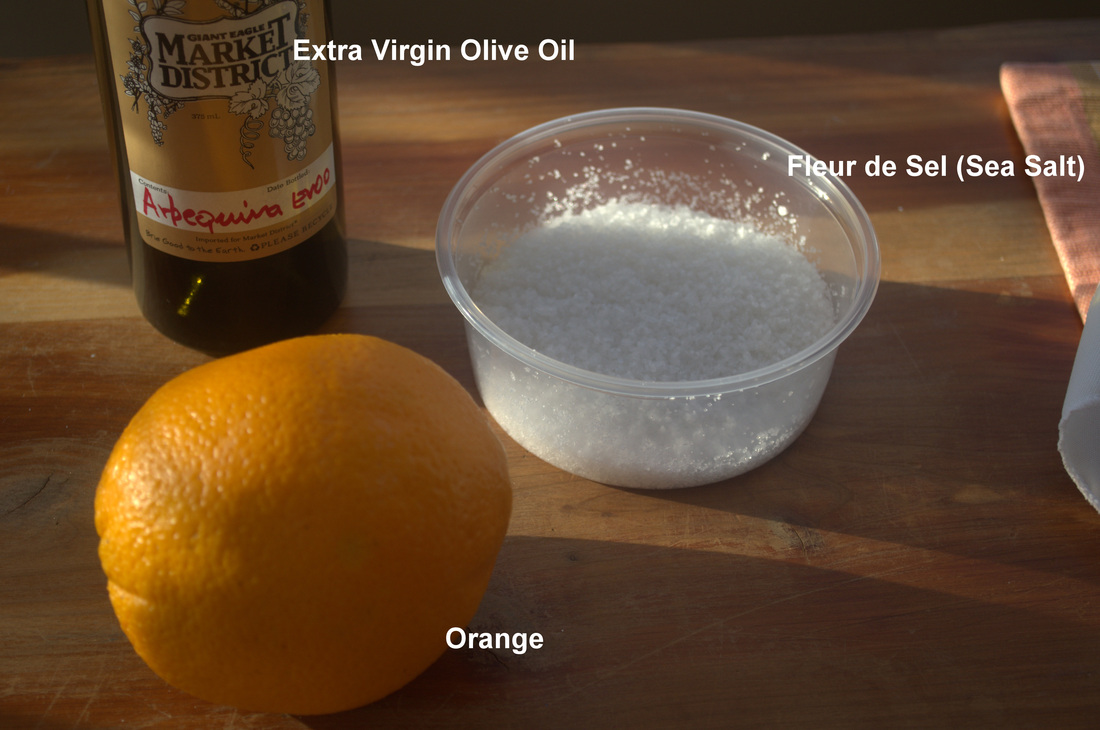
The Italian Orange Serves 1 1 orange, peeled and segmented 1 teaspoon extra virgin olive oil Sprinkle of sea salt, I use Fleur de Sel Place the segmented orange in a bowl, drizzle with olive oil, sprinkle with sea salt. Enjoy! 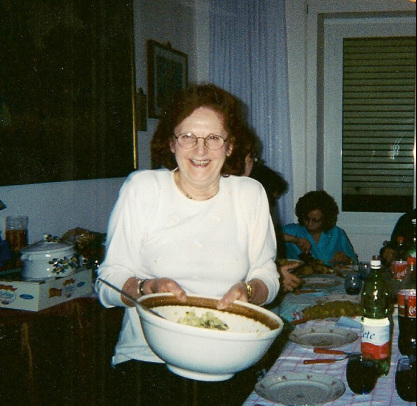
Zia Lucia
Source
Zia Lucia's original 
In continuing on with my healthy/citrus craving lately, today I'm sharing with you Orange Cranberry Muffins. When I was on Weight Watchers back in 2011 I had an urge to bake something (shocking, I know!) so I went searching through their website for something healthy, convenient and practical. I came across these muffins and just loved them! They are filled with dried cranberries and have a nice orange flavor. They are topped off with granulated sugar, which gives them the texture of a nice cake doughnut. The top is definitely my favorite part! I make a full batch of these and usually enjoy one fresh from the oven and freeze the rest. Once they are frozen I'll either grab one to go (they thaw out in about a half hour or so) or throw one in the microwave for 20-30 seconds. A muffin and some hot coffee - a perfect start to my day! Orange Cranberry Muffins Makes approximately 15 standard-sized muffins 2 cups all-purpose flour 2/3 cup granulated sugar, divided 1/2 cup sweetened, dried cranberries 2 teaspoons orange zest 2 teaspoons baking powder 1 teaspoon pumpkin pie spice 1/2 teaspoon baking soda 1/4 teaspoon salt 1 cup low-fat (1%) buttermilk ** 2 tablespoons salted butter, melted 1 egg, lightly beaten **If you don't have buttermilk on hand you can make a quick substitution by putting 1 tablespoon of acid (lemon juice, white vinegar, cider vinegar or white wine vinegar) in a measuring cup. Fill the rest of the cup with 1% or skim milk to make 1 full cup of liquid. Let sit 5 minutes. Stir and proceed to use in the recipe. Preheat oven to 400° F. Spray 15 muffin cups with nonstick cooking spray. Set aside.
Combine flour, 1/2 cup of sugar, cranberries, orange zest, baking powder, pumpkin pie spice, baking soda and salt in a large bowl. Whisk to combine. In a separate bowl mix together buttermilk, melted butter and egg. Add wet ingredients to the dry ingredients and mix until just combined. Spoon batter in prepared muffin tins. Sprinkle the remaining sugar over the tops of the muffins. Bake for 15 minutes, or until a toothpick inserted in the center comes out clean. Allow to cool in the pans a few minutes before transferring to a wire rack to cool completely. Source Weight Watchers 
So, I've been on a major health-kick since the start of 2013. Back in January 2011 something clicked in my brain and I started Weight Watchers and stuck to it for 3 months. I lost 15 pounds and I felt amazing! I was happy with my weight so I let some of the good habits slide a bit. Then at the beginning of 2012 I was starting my blog and training for the Pittsburgh Marathon Relay. I tried half-heartedly to eat the Weight-Watcher-Way but just couldn't make it happen with all the yummy things coming out of my kitchen! This wasn't a big deal because I was running more than usual so my weight pretty much stayed the same. Enter the 2nd half of 2012. All bets were off. We went on a 3-week vacation (running was minimal...eating was plentiful), moved out of our townhouse, into my parents' townhouse and FINALLY into our new home. After getting settled in the new house we were faced with Halloween candy, Thanksgiving dinner (and leftovers) and lots and lots of Christmas goodies. That brings me to January 2013. This year I am back on Weight Watchers and I'm doing a great job so far! I'm also training for 2 half-marathons (that's 13.1 miles, people!). I'm also trying very hard to incorporate fun food and baking into my daily life in a healthy way. I'm going to do my best to bring you healthy and delicious recipes as well as the occasional sinful treat! Oh, one more thing, you should be forewarned, I've been craving LOTS of citrus and oatmeal lately! Today I bring you a Weight Watcher inspired Orange Ginger Scented Granola. Orange juice and ground ginger are both used in this granola, but I feel the flavor is delicate, not overpowering. I have been enjoying this granola served over plain, nonfat yogurt. It's great for a light breakfast or a mid-afternoon snack. You could also serve it in a bowl with some milk, or just grab a handful as a quick snack on the go. 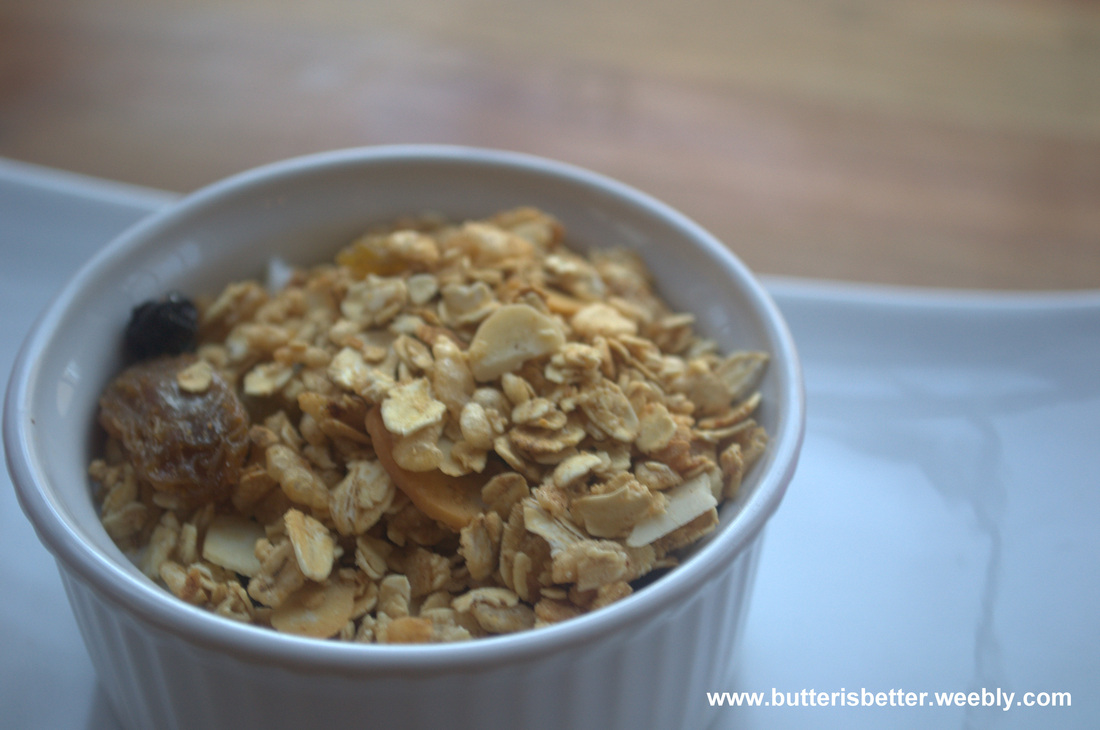
Orange Ginger Scented Granola
2 cups quick oats 1 cup old fashioned oats 2 cups puffed rice cereal, such as Rice Krispies 6 tablespoons honey 1 teaspoon canola oil 1/4 cup orange juice 1/2 teaspoon cinnamon 1/2 teaspoon ground ginger 1/2 teaspoon vanilla extract 1/4 cup sliced almonds 1/2 cup mixed raisins Preheat oven to 350° F. Mix oats and puffed rice cereal together in a large bowl. Spread evenly onto a rimmed, non-stick baking sheet. Bake for 10 minutes, stirring once. Remove from oven. Allow to cool slightly. While the cereals are baking, combine the honey, canola oil, orange juice, cinnamon, ground ginger and vanilla extract into a 2-cup measuring cup. Mix well. Set aside. Place slightly cooled cereal back in the large bowl. Stir in the almonds. Pour the liquid mixture into the bowl. Mix until well incorporated. Spread evenly onto the rimmed baking sheet again. Bake for 20 minutes or until the cereal starts to brown, stirring every 5 minutes. Remove from the oven, stir in the raisins and allow to cool. Once granola is cool, store in an airtight container. Adapted from Weight Watchers 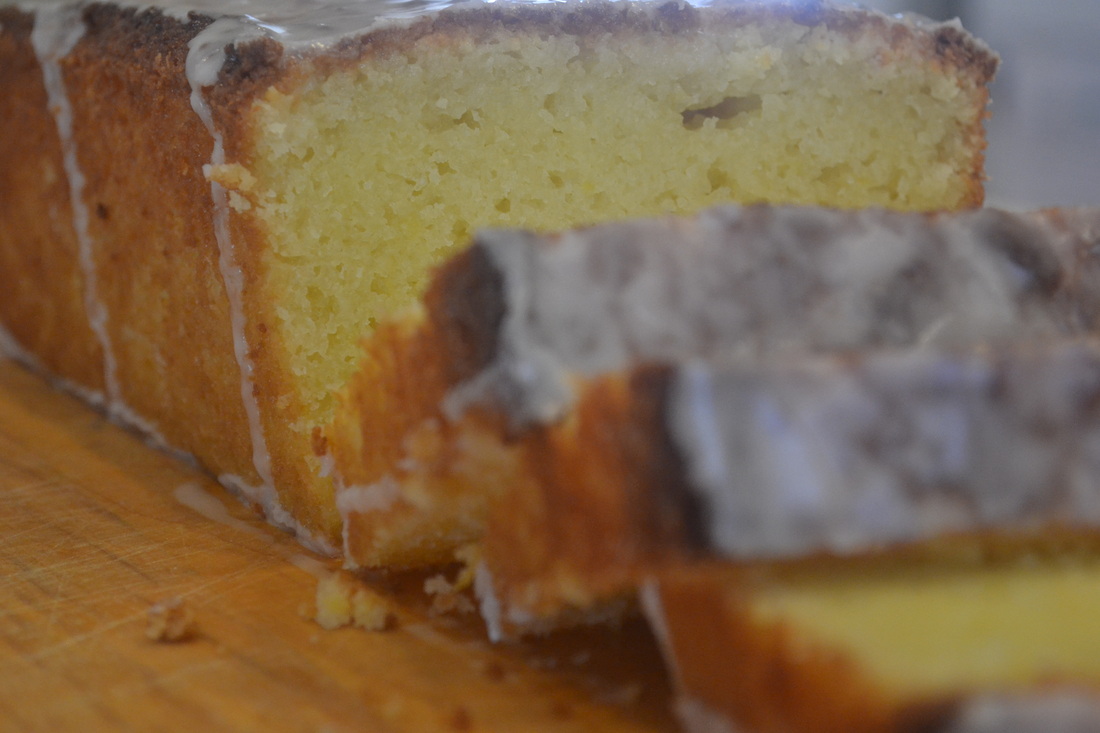
Hello and Happy New Year! Welcome back to the Butter Blog! After a very long break from blogging I've decided to start it up again and I'm very excited about it! There were so many things going on for me the 2nd half of last year that blogging took a backseat to other priorities. We've been in the new house for 3 months and have celebrated 3 major holidays already. Happily, moving boxes and decoration boxes are now all clear from my living space and I can finally relax, cook, blog and enjoy life....ahhhh! For a short while I contemplated stopping blogging altogether, but then I remembered why I started it in the beginning a little over a year ago - to challenge myself to try become a better cook, to document my favorite recipes all in one place and to share those recipes with friends and family. To that end, I am committing myself to blog at least one time a week, so...here goes!! The first recipe I want to share with you is a heavenly Lemon Loaf Cake. I made this cake several months ago, only a few weeks after we moved in, and I can still remember the taste of the cake so well! It has a beautiful yellow color inside the unassuming brown crust. The lemon flavor was bright but not overpowering. And the texture was a little dense, almost like a ricotta-based cake (which I LOVE!) and oh-so-indulgent! After eating my weight in sugar during the month of December I've found myself really craving citrus foods right now. This Lemon Loaf is perfect for that craving! I can't wait to get in the kitchen this weekend and make another batch! 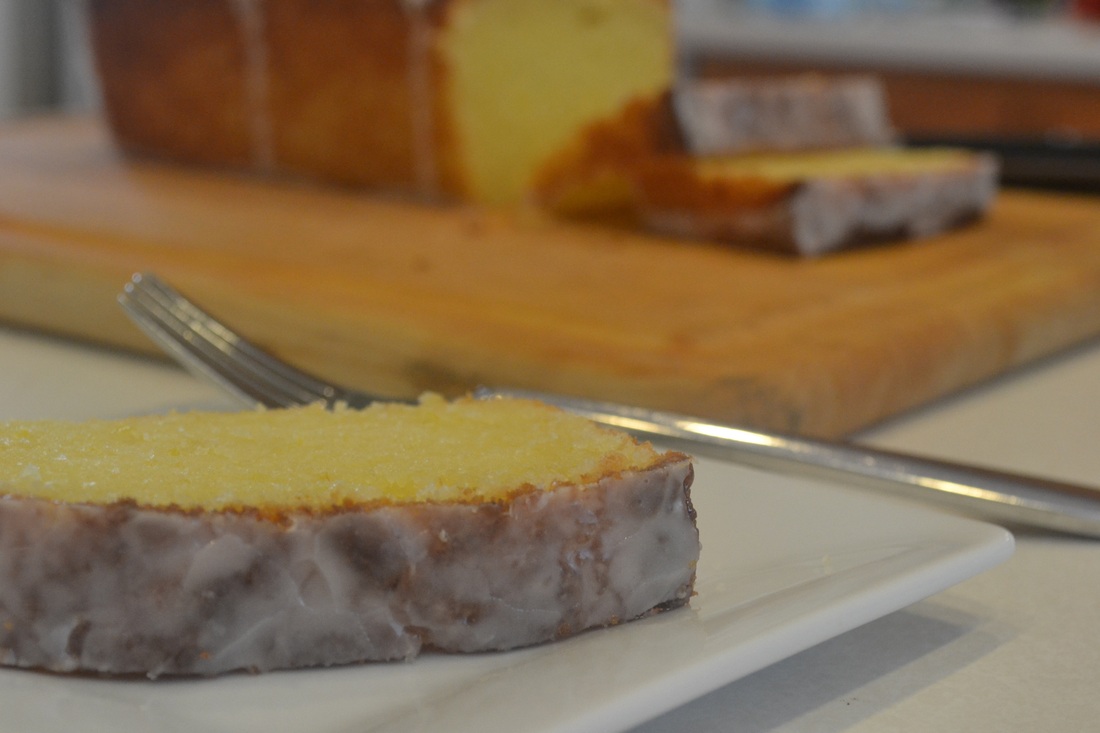
Lemon Loaf Cake
Makes 2 loaf cakes - approx 16 slices each For the cake 1 1/2 cups cake flour 1 1/2 cups all-purpose flour 2 teaspoons baking powder 1/4 teaspoon baking soda 1 teaspoon salt 2 1/4 cups granulated sugar 8 large eggs, at room temperature 1/4 cup lemon zest (approximately 2 lemons) 1/4 cup fresh lemon juice** 2 cups (4 sticks) unsalted butter, melted and cooled 1/2 cup sour cream 2 teaspoons vanilla extract **Tip: Zest your lemons while they are whole, before juicing. It is MUCH easier this way! For the lemon syrup 1/3 cup fresh lemon juice 1/3 cup granulated sugar For the lemon glaze 2 cups confectioner's sugar, sifted 4-6 tablespoons fresh lemon juice Preheat oven to 350° F. Butter sides and bottoms of 2 9-9-inch loaf pans. Line with parchment, then butter the parchment. Set aside. In a medium bowl, whisk together the cake flour, all-purpose flour, baking powder, baking soda and salt. Set aside. In the bowl of a stand mixer, fitted with a paddle attachment, combine the sugar, eggs, lemon zest and lemon juice. Mix on low speed until just combined. With the mixer running, slowing pour in the melted butter. Add the sour cream and vanilla and continue mixing until all ingredients are incorporated. Gradually add the flour mixture using a rubber spatula to gently fold in, being careful not to overmix. Divide the batter evenly between the prepared loaf pans. Bake on the middle rack for 20 minutes. Rotate the pans and reduce the oven temperature to 325° F. Continue baking for another 30-35 minutes, or until a toothpick inserted in the center of the cake comes out clean. Allow to cool in the pans for about 15 minutes. While the cakes are baking, prepare the lemon syrup. Combine the lemon juice and granulated sugar in a small saucepan over medium heat. Stir until the sugar is completely dissolved. Cook for approximately 3 more minutes. Remove from heat and set aside. Remove the cakes from the pans and place on a parchment or Silpat lined baking mat. Using a toothpick, poke holes in the tops and sides of the cakes. Brush with the lemon syrup, allow to soak in and brush again. Allow the cakes to cool for approximately 30 minutes. When the loaves are cool, prepare the lemon glaze. In a small bowl, whisk together the confectioner's sugar and 4 tablespoons of the lemon juice. The glaze should be thick, but pourable. Add more lemon juice, if needed, to reach desired consistency. Pour the glaze over top of each loaf (it will drip down the sides). Let sit for about 15 minutes, or until the glaze hardens, before serving. When I made this recipe I 'halved' it to only make one loaf. My loaf kept well, unsliced, in Tupperware until it was gone (about 5 days). I plan on making the full recipe the whole way through to the glaze and cutting and freezing it by the slice. I'm not sure how this will come out but I'm going to give it a try. It sure would be convenient to grab a yummy slice to go on busy mornings! Source: As seen on Cook Like a Champion, originally from Baked: New Frontiers in Baking 
Have you ever woken up for an early morning workout and about 10 minutes in you realized that you are sluggish and have no energy? You begin wondering why you didn't eat a quick piece of toast or a banana, even though neither sound very appealing. Well, I have a real treat for you today! These little energy bites are nutritious and full of carbs and protein but tasty and crave-able, unlike those energy bars they sell in the little foil wrapper! I had pinned these on Pinterest several months ago and forgotten about them. For some random reason they popped into my head about a month ago and I decided to make them immediately - especially since I already had most of the ingredients on hand. One small adaptation I made from the original recipe is using whole flax seeds instead of ground. I couldn't find ground flax seeds at my store and though I could grind it up myself I chose not to. I like the texture and the 'pop' of the whole flax seeds and I think they give the little bites a prettier look! I imagine you could sub-out many different add-ins if you choose to, but I think they are just perfect as-is! I have been grabbing 1 or 2 before my morning runs and when I get a sweet craving in the middle of the day. They are so yummy that I'm having a hard time keeping the fridge stocked!! Time to go make another batch! 
No Bake Energy Bites
Makes 20-24 1 cup quick-cooking oatmeal 1/2 cup peanut butter (or other nut butter) 1/3 cup honey 1 cup coconut flakes 1/2 cup flax seeds 1/2 cup chocolate chips 1 tsp vanilla Mix everything together in a medium mixing bowl until all ingredients are incorporated. Let chill in the refrigerator for about a half hour. Once chilled, drop by heaping tablespoons onto a silicone baking mat. Roll into balls. Refrigerate in a sealed container. Source: Adapted from Smashed Peas and Carrots  It seems these days my Kitchen-Aid stand mixer and my oven are pretty much always in use. I've been baking ALOT this year. As I've said before, I love baking cupcakes and sweets, but I need to get my baking 'fix' by finding more diverse recipes. I've already started making my own hamburger buns and sandwich bread and recently I've discovered scones. Scones are my new best friend at breakfast time! The neat thing about scones is that you can whip up a batch and freeze them. Then when you have a scone craving just pop a frozen one in the oven and about 20 minutes later you have a fresh, flaky, hot breakfast! I've made sweet scones before and they are great too, but with the bacon and cheese these savory ones just scream 'breakfast' to me! As with most scone recipes, I divide the dough into two disks and cut 16 smaller ones instead of 8 regular-sized ones. This lets me enjoy one on a weekday morning (translated: post-run) with a piece of fruit and not feel like I just negated all my efforts on the trail!  Bacon Cheddar Chive Scones
Makes 8 scones (or 16 mini scones) 2 cups all-purpose flour 1 tsp kosher salt 1 tbsp baking powder 2 tsp sugar 4 tbsp cold butter, diced 1 cup cheddar cheese, diced 1/3 cup chives, minced 6 slices of bacon, cooked and crumbled 1 cup, plus 2 tbsp heavy cream, divided Preheat oven to 425. Line a baking sheet with a silicone baking mat. Set aside. In the bowl of a food processor, combine flour, salt, baking powder and sugar. Pulse a few times to combine. Add cold butter to food processor and pulse a few more times. Do not over-mix. You want the mixture to be unevenly crumbly. Transfer the flour mixture to a large bowl. Add cheese, chives and crumbled bacon, tossing to combine. Try to work quickly, as you don't want the butter to start melting. Add heavy cream. Using your hands, gently mix to combine all ingredients evenly. Turn the mixture out onto a well-floured work surface. Pat the shaggy dough into a smooth disk - about 7" wide and 3/4" thick. Transfer disk to the prepared baking sheet. Using a knife or bench knife, cut the disk into 8 wedges. Spread them out a bit on the pan. **If freezing, place the unbaked scones on a baking sheet (small enough to fit in your freezer) and freeze for approximately 30 minutes. Once frozen, wrap each scone in plastic wrap and place in a freezer-safe bag. Bake time should be about the same. Brush some heavy cream on top of the scones to help them brown. Bake for 22-24 minutes until they are browned on top. Remove from oven and cool on the pan. Serve warm or at room temperature. |
AuthorPittsburgh area mom striving to provide clean, healthy, REAL food for her family! Categories
All
Archives
September 2014
|
 RSS Feed
